Welcome to our step-by-step guide to making your own homemade soy candles! In this tutorial, we’ll walk you through all the necessary steps to create beautiful and eco-friendly soy candles right in the comfort of your own home.
If you’ve ever wondered how to make your own candles or have been intrigued by the idea of candle making, you’re in the right place. Whether you’re a beginner or have some experience in candle making, this guide will provide you with all the necessary instructions and tips to create your very own soy candles.
Candle making is a rewarding and creative hobby that allows you to personalize your living space, create heartfelt gifts, or even start a small business. By making soy candles, you’ll enjoy the benefits of using a natural and sustainable wax that provides a clean and long-lasting burn.
Throughout this tutorial, we’ll cover everything from selecting the right wax to adding fragrance oils and prepping your containers. With our detailed instructions and helpful tips and tricks, you’ll be well on your way to becoming a soy candle-making pro in no time. So, let’s dive in and get started on your DIY soy candle-making adventure!
Why Choose Soy Wax?
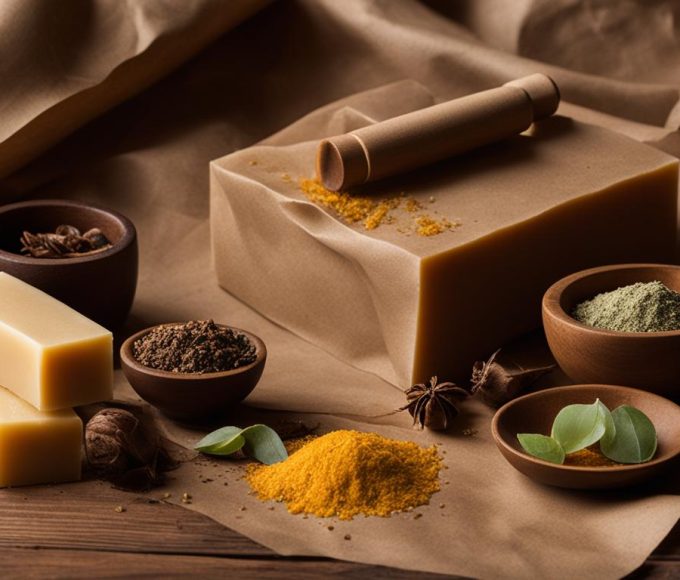
Soy wax is the perfect choice for your homemade candles. Not only is it easy to work with, but it also offers a range of benefits that make it a popular option among candle makers.
One of the main advantages of soy wax is its eco-friendliness. Derived from soybeans, a renewable resource, soy wax is a sustainable alternative to traditional paraffin wax. By using soy wax, you can contribute to a greener environment.
When it comes to candle performance, soy wax candles have several advantages. They have a longer burn time compared to paraffin candles, allowing you to enjoy their warm glow for more extended periods.
Additionally, cleaning up soy wax is a breeze. Unlike paraffin wax, soy wax can be easily cleaned with soap and water, making it a convenient choice for spillages or when you want to repurpose your candle containers.
By choosing soy wax for your candle making projects, you are not only making an eco-friendly choice but also creating candles with exceptional burn time and easy maintenance. It’s a win-win situation that will bring you both satisfaction and peace of mind.
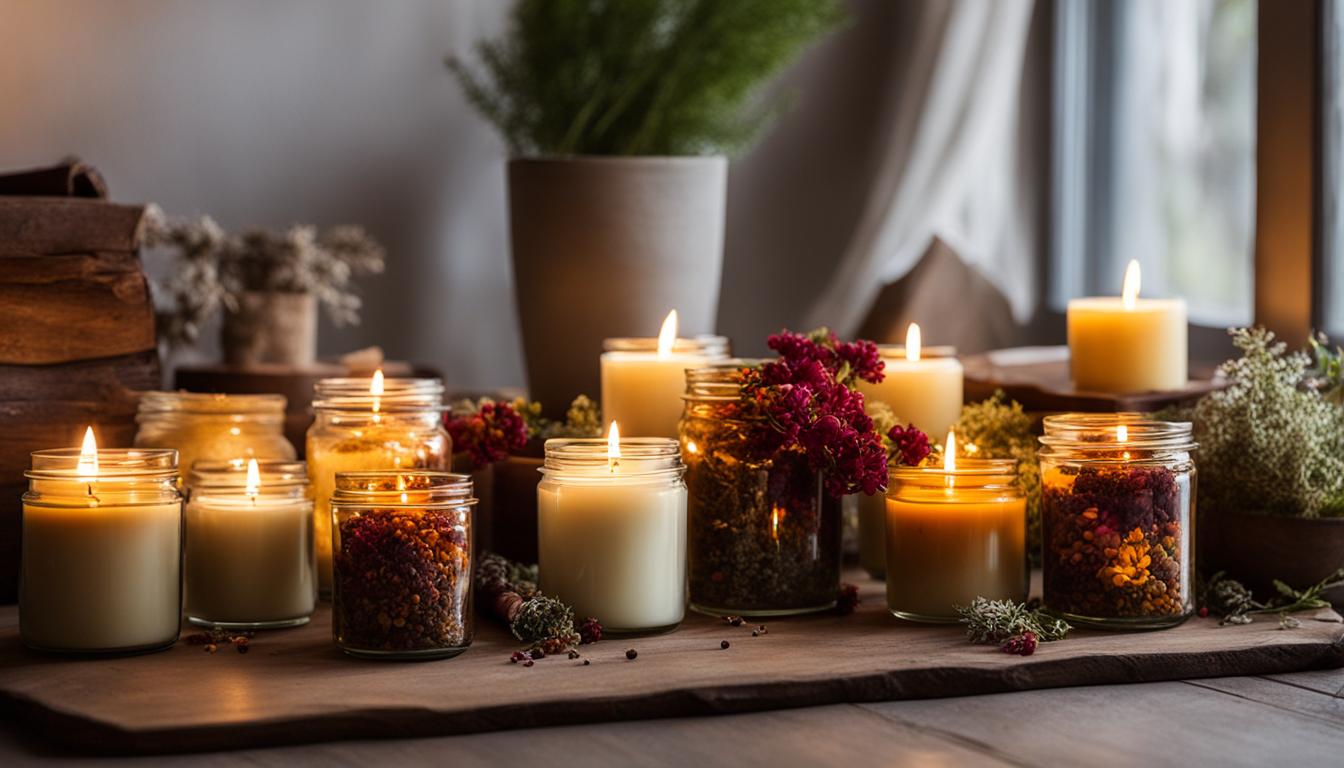
Take a moment to appreciate the many benefits of soy wax by enjoying this visually appealing image:
Supplies Needed for Soy Candle Making

Before you begin making soy candles, make sure you have all the necessary supplies. Gathering these essential candle making supplies beforehand will ensure a smooth and satisfying candle making process.
Here’s a list of the supplies you’ll need:
- Soy wax flakes: These are the main ingredient for your soy candles, providing clean and long-lasting burns.
- Wicks: Choose wicks suitable for soy wax, ensuring they are the right size and material for optimal burning.
- Pouring pitcher: A heat-resistant pouring pitcher makes it easy to transfer the melted wax into the candle containers.
- Thermometer: A thermometer is necessary to monitor the temperature of the melting wax and ensure it reaches the proper pouring temperature.
- Containers: Select containers that are suitable for candles, such as glass jars or tins, based on your preferred style and size.
- Double boiler or heat-proof container: A double boiler setup or a heat-proof container to melt the wax safely is essential for consistent and controlled heating.
- Spatulas and paper towels: These handy tools are useful for stirring the wax, cleaning up spills, and ensuring a tidy workspace.
Gathering these candle making supplies will ensure you have everything you need to start creating your own beautiful soy candles. Now let’s move on to the next step: melting the wax.
Melting the Wax
To start making your soy candles, it’s important to melt the soy wax properly. This step prepares the wax for fragrance oil and ensures the best results for your candles. Follow these simple steps:
- Choose a double boiler or a heat-proof container that fits in a pot of simmering water. The double boiler method provides gentle and even heat distribution, preventing the wax from scorching.
- Place the soy wax flakes in the double boiler or container.
- Fill the pot with water and bring it to a simmer.
- As the water simmers, the heat will gradually melt the wax. Stir occasionally to promote even melting.
- While melting the wax, use a thermometer to monitor the temperature. The ideal temperature for melting soy wax is around 185°F (85°C). This ensures that the wax is fully melted and ready for the next step.
By melting the wax using the double boiler method and maintaining the correct temperature, you’ll have a smooth and uniform wax consistency, ready for adding fragrance, color, and pouring into your candle containers.
For a visual reference, here is an image showing the process of melting soy wax:
Now that your soy wax is properly melted, you’re ready to move on to the next step: adding fragrance and color to your candles.
Adding Fragrance and Color

Once the soy wax has melted, it’s time to add fragrance oils and color to your homemade soy candles. By carefully selecting the right fragrance oils and adding them at the recommended percentage, you can create beautifully scented candles that fill your space with delightful aromas.
To begin, choose fragrance oils specifically designed for soy candles. These oils are formulated to work well with soy wax, resulting in a strong and lasting scent. Add the fragrance oil to the melted wax, following the guidelines provided by the manufacturer. The recommended percentage is typically around 6-10% of the total wax weight, but it may vary depending on the fragrance and desired intensity.
Once you’ve added the fragrance oil, it’s time to add some color to your candles. You can use dye specifically made for soy wax to achieve your desired hues. Begin by selecting the color you want and following the manufacturer’s instructions for the recommended amount. Add the dye to the melted wax and stir thoroughly to distribute the color evenly.
Remember to be mindful of the amount of dye you add, as adding too much can affect the candle’s burning performance. It’s essential to strike a balance between achieving the desired color and ensuring the soy wax retains its superior burn qualities.
Using fragrance oils and colorants allows you to personalize your soy candles, making them unique and tailored to your preferences or the occasion you’re creating them for. Experiment with different combinations to find the perfect blend of scents and colors.
Preparing Containers and Wicks
While the wax cools slightly, it’s essential to prepare your candle containers and wicks. Clean the containers with isopropyl alcohol to ensure a pristine surface for your candles. This step helps the wax adhere to the containers and prevents any residue from affecting the burning process.
Next, attach wick stickers to the bottom of each container. These adhesive stickers secure the wicks in place, preventing them from shifting or floating as the wax solidifies. Ensure that the wick stickers adhere firmly for optimal stability during the candle-making process.
Now, it’s time to position the wicks in the center of each container. To achieve this, you can use wick centering devices or other handy tools designed specifically for candle making. These tools help keep the wicks straight and centered, ensuring an even burn and maximizing the efficiency of your candles.
Properly preparing the containers and wicks is crucial for producing well-centered and efficient burning candles. Taking the time to clean the containers, attach wick stickers, and position the wicks correctly will contribute to the overall quality and aesthetics of your homemade soy candles.
Pouring and Curing the Candles
Now that your soy wax has cooled slightly, it’s time to pour it into the prepared containers. Carefully fill each container, making sure to leave enough space at the top for the wax to expand as it cools. This step is crucial as it determines the final shape and appearance of your candles.
Once you’ve poured the wax, allow the candles to cool and set completely at room temperature. This process typically takes a few hours, but it’s important to be patient. Avoid moving the candles during this time to prevent any misshaping or uneven cooling.
After the candles have cooled and set, you may notice some excess wax around the edges of the containers. Take a clean knife or spatula and gently remove any excess wax to ensure a clean and professional-looking finish.
Next, trim the wicks to a desired length, leaving about ¼ inch (6mm) above the wax surface. This will help the wicks burn evenly and prevent excessive smoke or soot formation. Properly trimmed wicks also make it easier to light your candles.
For safety purposes, it’s essential to add warning labels to your soy candles. These labels should indicate important safety instructions like “Keep away from children” and “Never leave candles unattended.” By including warning labels, you ensure a safe and enjoyable experience for yourself and anyone who uses your candles.
Now it’s time to let your candles cure. Curing is the process that allows the fragrance to fully infuse with the soy wax, enhancing the scent performance. For the best results, let your candles cure for a minimum of three days. However, if you can wait a little longer, 2-3 weeks of curing time is ideal for soy candles.
During the curing period, keep your candles in a cool, dry place, away from direct sunlight and extreme temperature changes. This controlled environment promotes optimal scent development and ensures your candles reach their full potential.
While you wait for your candles to cure, take a moment to admire your handiwork. The beautiful containers, vibrant colors, and enticing fragrances are a testament to your creativity and dedication to the craft of candle making.
Once your candles have fully cured, they are ready to be enjoyed or gifted to loved ones. Light them up, sit back, and revel in the cozy ambiance and soothing scents that your homemade soy candles bring to any space.
Personalizing and Enjoying Your Soy Candles
Now that your soy candles are complete, it’s time to unleash your creativity and personalize them to your heart’s content. Customizing soy candles is not only a fun and rewarding experience but also a way to create unique and thoughtful gifts for your loved ones. Whether you’re a seasoned candle enthusiast or just starting out, candle crafting can be an enjoyable hobby that allows you to express your creativity while bringing warmth and ambiance to any space.
One of the most exciting aspects of customizing soy candles is the ability to experiment with different fragrances and create your own signature scents. Select from a wide range of high-quality fragrance oils, each offering its own unique aroma and mood. Whether you prefer soothing lavender, refreshing citrus, or cozy vanilla, the options are endless. Mix and match scents to create intriguing combinations or stick to your favorites—it’s all about personal preference.
Colors can also play a significant role in customizing your soy candles. Explore different dyes or natural colorants to achieve the perfect hue that complements your style and decor. Whether you prefer vibrant and bold shades or soft and pastel tones, the right color can enhance the overall aesthetic appeal of your candles. Let your imagination guide you as you experiment with various color combinations to create eye-catching and visually pleasing candles.
Don’t forget about the decorative elements! You can further personalize your soy candles by adding embellishments such as dried flowers, herbs, or even glitter. These small touches can transform your candles into unique works of art, reflecting your personality and style. Get inspired by nature, current trends, or your own creativity to create stunning and Instagram-worthy candles that will impress anyone who receives them.
Aside from being a rewarding hobby, candle crafting allows you to create one-of-a-kind gifts for special occasions and celebrations. Homemade soy candles make thoughtful presents for birthdays, anniversaries, housewarmings, or just to show someone you care. You can customize the fragrance, color, and container to suit the recipient’s preferences, making it a truly personal and meaningful gift. Imagine the joy on their face when they receive a beautifully handcrafted candle made with love.
So, go ahead and unleash your inner candle maker. Enjoy the process of creating your own beautiful and eco-friendly soy candles, tailor-made to suit your taste or make cherished gifts for your loved ones. With endless possibilities for customization, candle crafting is an art form that brings warmth, tranquility, and a touch of luxury to any environment.
Conclusion
Making homemade soy candles is not only a fulfilling and creative activity but also a sustainable choice for those who are eco-conscious. This step-by-step guide has equipped you with the knowledge and skills to create your own handcrafted soy candles, allowing you to personalize the fragrance, color, and design to match your preferences.
As you embark on this candle-making journey, remember to prioritize safety by following proper handling and precautionary measures. Experiment with different fragrance oils and dyes to create unique combinations that reflect your style and bring joy to your space.
For further inspiration and resources, there is a wealth of online tutorials and communities dedicated to candle crafting. These platforms provide valuable tips and tricks from experienced candle makers, allowing you to expand your knowledge and enhance your candle-making skills.
Whether it’s for personal enjoyment or to create thoughtful gifts for loved ones, the art of making homemade soy candles offers a delightful and sustainable way to enhance your living space. So, let your creativity shine, and enjoy the soothing ambiance and natural glow of your homemade soy candles.

