Building a DIY outdoor fire pit is a great way to enhance outdoor gatherings and create a cozy ambiance in your backyard. You can easily build a fire pit using inexpensive or repurposed materials such as stone, bricks, pavers, concrete, and retaining wall blocks. The cost of DIY fire pits can range between $50 and $150, depending on the materials used. In this article, we will provide a step-by-step guide on how to build a DIY outdoor fire pit using easy materials.
Materials for Building a DIY Outdoor Fire Pit
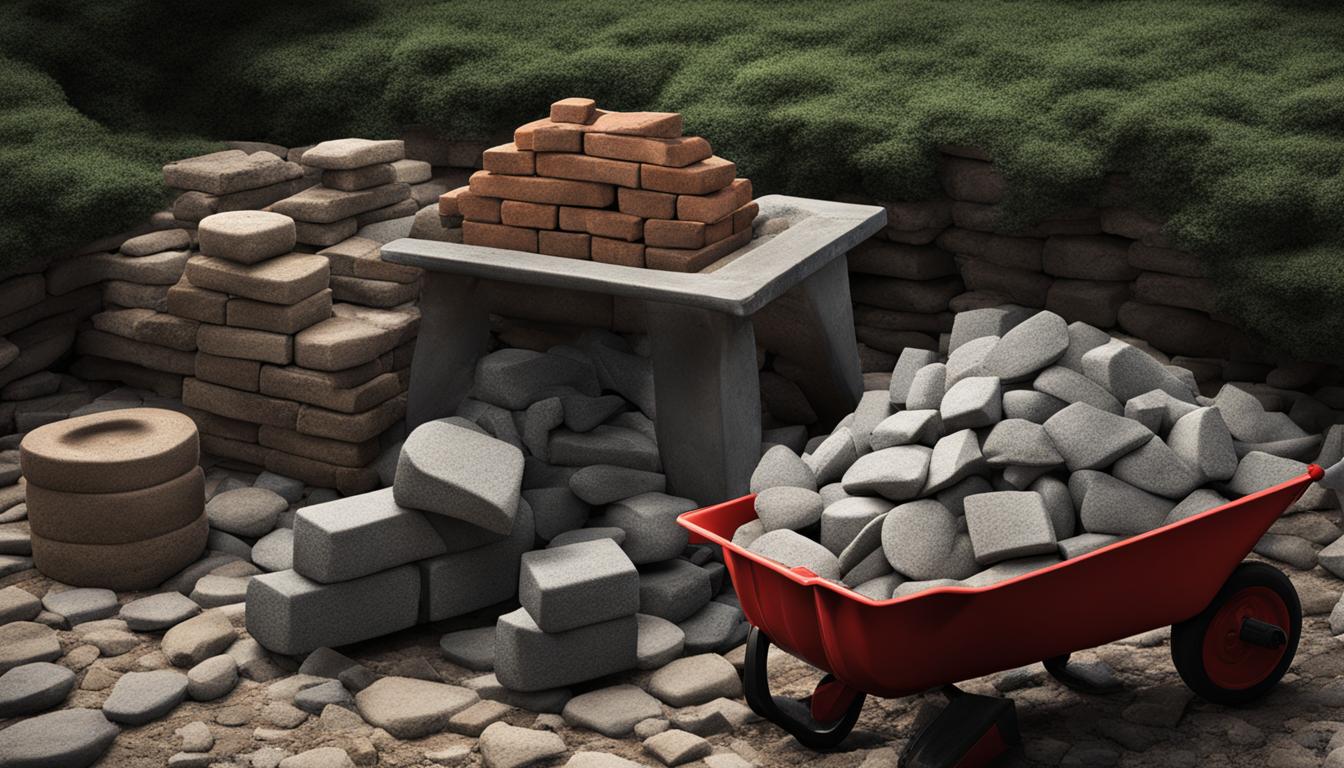
When it comes to building a DIY outdoor fire pit, you have a variety of materials to choose from. Whether you’re looking for affordability, ease of use, or a specific aesthetic, there are options that will meet your needs and preferences. Here are some popular materials for constructing your own fire pit:
1. Stone: Stone is a timeless and durable choice for a fire pit. You can opt for natural stone or manufactured stone veneers, depending on your budget and desired look. Stone fire pits provide a rustic and elegant appeal to your outdoor space.
2. Bricks: Bricks are another common material for DIY fire pits. They are readily available, affordable, and easy to work with. You can choose different colors and patterns to create a unique design that matches your outdoor aesthetic.
3. Pavers: Pavers are versatile and budget-friendly materials that come in various shapes, sizes, and colors. They are easy to install and provide a clean and modern look to your fire pit.
4. Concrete: Concrete blocks or poured concrete can be used to build a sturdy and long-lasting fire pit. Concrete offers flexibility in design and can be molded into different shapes and sizes.
5. Retaining Wall Blocks: If you’re looking for a more substantial and structural fire pit, retaining wall blocks are a great choice. These blocks are designed to withstand heavy loads and provide a solid foundation for your fire pit.
In addition to these commonly used materials, you can also get creative and repurpose items such as old garden ponds, metal planters, or even beer kegs to build a unique fire pit that reflects your personal style and preferences.
Remember, when choosing the materials for your DIY fire pit, consider factors such as the size, shape, and style you want to achieve. Select materials that align with your budget and design vision to create a fire pit that you’ll enjoy for years to come.
Choosing the Location for Your DIY Fire Pit
Before building a DIY outdoor fire pit, it’s crucial to choose a safe and suitable location. Take into account the following factors to ensure a safe and enjoyable fire pit experience.
Check Local Regulations and Guidelines
Start by checking the local regulations and homeowner association guidelines in your area. This step is important to ensure that fire pits are allowed and to understand any specific regulations or restrictions you need to follow. By familiarizing yourself with the rules, you can avoid any potential legal issues and build your fire pit with confidence.
Consider Safety and Proximity
When selecting the location, keep safety in mind. Choose an area in your backyard that is away from flammable structures, such as buildings, fences, and overhanging trees. This will help prevent accidents and minimize the risk of fire spreading. Additionally, clear any tree branches or vegetation that could potentially ignite from sparks or embers.
Be Mindful of Wind Patterns
Wind patterns play a crucial role in ensuring a comfortable fire pit experience. Position your fire pit in an area where the prevailing winds blow smoke away from your home. This will help reduce smoke accumulation and prevent it from entering your living spaces. By understanding the wind patterns in your backyard, you can enjoy your fire pit without any unwanted smoke-related issues.
Preparing the Fire Pit Site

Once you have chosen the location for your DIY fire pit, it’s time to prepare the site. Follow these steps to ensure a stable and level foundation for your fire pit:
Marking the Footprint
Start by marking the footprint of the fire pit using marking paint or temporary blocks. This will help you visualize the size and shape of the fire pit and ensure accurate excavation.
Excavating the Area
Within the marked perimeter, carefully excavate the area by removing the sod and dirt. Dig down to a depth of about 7 inches to create enough space for the fire pit.
Leveling the Excavated Area
After excavation, use a hand tamper to level the bottom of the pit. Tamp the soil down firmly to create a stable base. It’s important to ensure that the bottom of the pit is level to prevent any issues with the fire pit’s stability later on.
Adding a Layer of Sand
To create a smooth and even surface for your fire pit, consider adding a layer of sand on top of the compacted dirt. This will help with leveling and provide a solid base for the fire pit construction.
By following these steps, you will have properly prepared the site for your DIY fire pit. The next section will guide you through building the fire pit base, an essential component of a durable and functional fire pit.
Building the Fire Pit Base
To create a stable and fireproof base for your DIY fire pit, it’s important to start with the right materials and ensure proper construction techniques. The fire pit base serves as the foundation for the entire structure, providing stability and safety.
First, you’ll need to add a layer of crushed gravel paver base on top of the compacted dirt. This gravel base acts as a sturdy and fire-resistant barrier, helping to prevent the fire pit from sinking into the ground or causing damage to the surrounding area. The base should be approximately 5 inches thick, providing enough depth to support the weight of the fire pit and distribute heat evenly.
Wet the gravel thoroughly and use a hand tamper to compact it into a hard layer. This will help ensure a solid and level base for your fire pit. Be sure to check the levelness of the base at multiple points and make any necessary adjustments. A properly leveled base is essential for the structural integrity of your fire pit.
By taking the time to build a solid and level fire pit base, you’ll create a sturdy foundation that will support your fire pit and provide a safe and enjoyable outdoor space for gathering around the warmth of the fire.
Choosing the Right Base Materials
When selecting materials for your fire pit base, it’s important to choose ones that are durable, heat-resistant, and suitable for outdoor use. Some common options include:
- Crushed Gravel: This is one of the most popular choices for fire pit bases. It provides excellent drainage and heat resistance, making it a reliable option.
- Paver Base: Paver base is made of crushed stone and is designed to create a solid foundation for outdoor projects. It’s a cost-effective option that offers good stability.
- Sand: Sand can be used as a leveling agent between the compacted dirt and gravel base. It helps create a smooth surface and ensures proper alignment of the fire pit.
When choosing the base materials, consider factors such as your specific fire pit design, climate conditions, and budget. It’s always recommended to consult with a professional or research local building codes to ensure compliance and safety.
Constructing the Fire Pit Walls

Once you have successfully prepared the base for your DIY fire pit, it’s time to move on to the next step: constructing the walls. This is where you can let your creativity shine and choose from a variety of materials to build a fire pit that suits your style and preferences.
Depending on the shape and design of your fire pit, you can opt for stacked stones, bricks, concrete blocks, or pavers as your wall materials. These materials are durable, readily available, and provide excellent heat resistance to withstand the flames and heat from the fire.
Start by laying the first layer of blocks or stones, ensuring that they are tightly fit together and level. This will serve as the foundation for the rest of the walls. Use construction adhesive between the layers to securely bond the blocks or stones together, creating a sturdy structure that will stand the test of time.
As you continue building the walls, make sure to stagger the joints between the blocks or stones. This technique adds stability to the structure and prevents any potential weak points. You can experiment with different patterns and designs to give your fire pit a unique and personalized touch.
When determining the height of your fire pit walls, consider both aesthetics and functionality. The walls should be high enough to contain the fire and prevent embers from escaping but also allow for easy access and circulation of air.
By carefully constructing the walls of your DIY fire pit, you’ll create a focal point in your outdoor space that not only provides warmth and ambiance but also adds a touch of style. Let your imagination run wild and design a fire pit that reflects your personal taste and enhances your outdoor living area.
Adding the Fire Pit Bowl or Insert
To complete your DIY outdoor fire pit, you have the option to add a fire pit bowl or insert. These accessories not only enhance the functionality of the fire pit but also add aesthetic appeal to your outdoor space.
A fire pit bowl is a versatile accessory that comes in different sizes and materials, such as stainless steel or cast iron. It sits on top of the fire pit walls and provides a contained space for the fire. The bowl design allows for better heat distribution and a more controlled flame. Choose a fire pit bowl that fits your fire pit dimensions and complements your outdoor decor.
Alternatively, you can use a fire pit insert to protect the walls of your fire pit and prolong their lifespan. Inserts are typically made of heat-resistant materials and prevent the direct contact of flames with the fire pit walls. They are a practical addition for those who want to ensure the safety and longevity of their DIY fire pit.
Remember to consider both safety and aesthetics when choosing a fire pit bowl or insert for your DIY fire pit.
Enhance your outdoor experience with the perfect fire pit accessories. Whether you opt for a stylish fire pit bowl or a protective insert, these additions will elevate the visual appeal and functionality of your DIY fire pit. Choose the right accessories to complete your fire pit project and create the perfect ambiance for relaxing evenings in your backyard.
Fire Pit Safety Tips
When enjoying the warmth and beauty of a DIY outdoor fire pit, it’s essential to prioritize safety. By following these fire pit safety precautions and guidelines, you can ensure a secure and enjoyable experience:
1. Site Selection
Choose a safe location for your fire pit. Avoid placing it near flammable structures or low-hanging trees. Clear any overhanging branches that could pose a fire hazard. Additionally, be aware of wind patterns to prevent smoke from entering your home.
2. Supervision
Always supervise the fire pit when it’s in use. Never leave it unattended, especially if there are children or pets around. Ensure that everyone stays a safe distance away from the fire, and establish clear rules for behavior around the fire pit.
3. Extinguishing the Fire
Properly extinguish the fire before leaving the fire pit unattended. Use water or a fire extinguisher to ensure the fire is completely out. Avoid leaving smoldering embers or hot coals behind.
4. Heat Protection
Protect yourself and others from the heat of the fire pit. Maintain a safe distance from the fire, and avoid wearing loose or flammable clothing that may catch fire. Use fire-resistant gloves and tools when tending to the fire.
5. Maintenance
Regularly maintain your fire pit to ensure its safety and longevity. Keep the fire pit clean by removing ashes and debris after each use. Inspect the fire pit for any damage or wear, and promptly repair or replace any compromised components.
By following these fire pit safety tips, you can enjoy the warmth and ambiance of your DIY outdoor fire pit while keeping yourself and your loved ones safe. Remember, fire pit safety is paramount for a memorable and worry-free experience.
Fire Pit Design Inspiration
If you’re looking for inspiration for your DIY outdoor fire pit, we have some creative design ideas that will ignite your imagination. Whether you want a rustic, modern, or eclectic fire pit, these unique projects will add charm and warmth to your backyard gatherings.
1. Stone Circle Fire Pit
Create a stunning focal point in your outdoor space with a stone circle fire pit. Use large, flat stones to build a circular wall and enclose the fire area. This design not only provides a beautiful seating area but also allows everyone to gather around the fire and enjoy its warmth.
2. Tabletop Fire Pit
If you have limited outdoor space or simply want a portable fire pit, a tabletop fire pit is perfect for you. Convert an old metal planter or decorative bowl into a miniature fire pit by filling it with fire-resistant rocks and adding a small ethanol burner. Place it on your patio table and enjoy the cozy ambiance while sipping your favorite drink.
3. Sunken Fire Pit
A sunken fire pit adds a touch of sophistication to your backyard. Dig a shallow pit, line it with fire-resistant bricks or stones, and create seating around the pit with comfortable cushions or built-in benches. This design creates a cozy and intimate atmosphere, perfect for relaxing and sharing stories with friends and family.
4. Fire Pit Water Feature
Add an element of tranquility to your outdoor space by incorporating a water feature into your fire pit design. Build a square or rectangular fire pit and include a small waterfall or fountain on one side. The sound of flowing water combined with the crackling fire creates a soothing ambiance, making it an ideal spot for relaxation.
5. Fire Pit Grill Combo
Combine the joy of grilling with the warmth of a fire pit by creating a fire pit grill combo. Build a fire pit with a removable grill grate on top. This versatile design allows you to cook delicious meals while enjoying the cozy flames in the evening. It’s the perfect setup for outdoor cooking and entertaining.
These DIY fire pit ideas will not only provide warmth but also become a stunning focal point in your outdoor living space. Get creative, customize the design to suit your style, and create a unique fire pit that will be the envy of your neighbors.
Maintenance and Upkeep of Your Fire Pit
To ensure the longevity and proper functioning of your DIY outdoor fire pit, follow these maintenance tips:
1. Regular Cleaning
Keeping your fire pit clean is essential for both its appearance and functionality. Remove any leftover ashes and debris after each use. Use a shovel or a fireplace brush to sweep out the ashes. You can also use a mild soap and water solution to clean the fire pit walls, if necessary. Make sure to rinse and dry the fire pit thoroughly before using it again.
2. Protect from the Elements
Shield your fire pit from the elements when it’s not in use. Use a fire pit cover or a tarp to protect it from rain, snow, and harsh sunlight. This will help prevent rusting and damage to the fire pit’s surface. Additionally, consider storing any removable parts, such as the fire pit bowl or insert, in a dry and covered area to prolong their lifespan.
3. Inspect for Damage
Regularly inspect your fire pit for any signs of damage or wear. Check for cracks in the fire pit walls or loose bricks or stones. If you notice any damage, make the necessary repairs promptly to prevent further deterioration. You can use a fire pit repair kit or consult a professional if needed.
4. Use Proper Fire Pit Tools
When tending to your fire pit, always use proper fire pit tools. This includes a fire pit poker for adjusting the logs and a fire pit shovel for removing ashes. Avoid using flammable liquids or materials to start the fire, as this can be dangerous and cause damage to your fire pit.
5. Practice Safe Burning
Follow safety guidelines when using your fire pit. Only burn dry and well-seasoned firewood. Avoid burning treated wood, trash, or leaves, as these can release harmful chemicals or sparks. Always keep a fire extinguisher or a bucket of sand nearby in case of emergencies. Lastly, never leave your fire pit unattended and keep a close eye on it at all times.
By following these maintenance tips, you can ensure that your DIY outdoor fire pit remains in excellent condition, providing you with many memorable moments around the cozy warmth of the fire.
Conclusion
Building your own DIY outdoor fire pit is a rewarding and cost-effective project that can transform your backyard into a cozy and inviting space. By following the step-by-step guide provided in this article, you can easily construct a personalized fire pit using easy-to-find and budget-friendly materials such as stone, bricks, pavers, concrete, or retaining wall blocks.
Throughout the construction process, it’s important to prioritize safety by choosing a suitable location, ensuring proper ventilation, and practicing fire pit safety precautions. By considering factors such as local regulations, proximity to flammable structures, and wind patterns, you can enjoy your fire pit responsibly and minimize potential risks.
Not only does a DIY fire pit offer warmth and ambiance, but it also adds a touch of elegance and style to your outdoor space. You can get creative with different design options, patterns, and materials to customize your fire pit to complement your unique taste and outdoor decor. Adding a fire pit bowl or insert enhances both the functionality and aesthetics of your fire pit, giving it a polished and finished look.
Whether you’re hosting a gathering with family and friends, toasting marshmallows, or simply enjoying a quiet evening under the stars, a DIY fire pit creates a cozy atmosphere that will make lasting memories. So grab your materials, follow the step-by-step guide, and ignite your backyard ambiance with a DIY fire pit today!


