
Are you looking to add some rustic charm to your home? DIY farmhouse-style wall shelves made from reclaimed wood are the perfect solution. Not only will they give your space a warm and cozy feel, but they’re also a fun and budget-friendly project to tackle. Whether you’re a seasoned DIYer or a beginner, these DIY farmhouse wall shelves are easy to make and can be customized to fit any room.
By repurposing reclaimed wood, you’re not only adding a unique touch to your decor but also contributing to sustainability by reducing waste. The character and history of reclaimed wood can’t be replicated with new materials, making it the perfect choice for farmhouse-style shelves with a story to tell.
In this article, we’ll guide you through the process of building your own DIY farmhouse wall shelves using reclaimed wood. From sourcing the materials to assembling the shelves and adding the finishing touches, we’ve got you covered. Get ready to embark on a creative journey and transform your space with the charm of farmhouse decor.
Why Choose Reclaimed Wood for Your DIY Farmhouse Wall Shelves
When it comes to creating DIY farmhouse wall shelves, reclaimed wood is the perfect choice. Not only does it add a touch of rustic charm to your space, but it also carries significant environmental benefits. By repurposing materials that would otherwise end up in a landfill, you are contributing to a more sustainable future.
What makes reclaimed wood truly special is the story it tells. Each piece has its own unique character, bearing the marks of its previous life. This adds to the farmhouse-style aesthetic, giving your shelves a truly authentic and lived-in feel.
By using reclaimed wood, you can create one-of-a-kind shelves that showcase your creativity and commitment to sustainable living. The process of sourcing and working with reclaimed wood is rewarding in itself, as you discover hidden treasures and transform them into functional, beautiful wall shelves.
In the following sections, we will guide you through the process of sourcing the materials and assembling your DIY farmhouse wall shelves. But first, let’s explore the many reasons why reclaimed wood is the perfect choice for your project.
Enhancing Your Space with Rustic Charm
Rustic charm is a key element of the farmhouse-style aesthetic. Reclaimed wood brings an inherent warmth and character that simply cannot be replicated with new materials. Whether you’re going for a cozy, farmhouse-inspired kitchen or a vintage-inspired living room, reclaimed wood wall shelves will add a touch of authenticity and timeless appeal.
Reducing Environmental Impact
Choosing reclaimed wood is an eco-conscious decision. By repurposing existing materials, you are helping to reduce deforestation and the demand for new resources. This sustainable approach not only benefits the environment but also encourages others to adopt more conscious choices in their own DIY projects.
Durable and Long-Lasting
Reclaimed wood is often sourced from old structures, such as barns or factories, where it has already stood the test of time. This means that the wood is sturdy and durable, ensuring that your DIY farmhouse wall shelves will last for years to come. Its ability to withstand the elements and daily use makes it an excellent choice for any room in your home.
Adding a Touch of History
Each piece of reclaimed wood carries a unique history. Whether it was salvaged from an old barn or a historic building, the wood tells a story of the past. By incorporating these elements into your DIY wall shelves, you’re not only honoring the craftsmanship of the past, but also adding a sense of nostalgia and character to your space.
Now that you understand the benefits of using reclaimed wood for your DIY farmhouse wall shelves, let’s move on to the next section, where we will guide you through the process of sourcing the materials.
Sourcing Reclaimed Wood for Your DIY Farmhouse Wall Shelves

When it comes to sourcing reclaimed wood for your DIY farmhouse wall shelves, there are several options available to you. One of the most popular sources is salvage yards, where you can find a wide variety of reclaimed materials, including wood, that can be repurposed for your shelves. Alternatively, you can explore antique shops, as they often have unique pieces of reclaimed wood that can add character to your project.
Another option is to consider using reclaimed wood from your own property. If you have any old structures, such as barns or sheds, that are no longer in use, you can deconstruct them and repurpose the lumber for your farmhouse wall shelves. This not only saves you money but also adds a personal touch to your project.
If you don’t have access to salvage yards or antique shops, don’t worry! You may have connections with local businesses or individuals who have reclaimed wood available. Reach out to them and inquire if they would be willing to donate or sell the reclaimed wood to you. Remember, it’s essential to choose wood that is in good condition and free from rot or pests to ensure the longevity of your shelves.
Now that you have your reclaimed wood sourced and ready, it’s time to move on to the next step in the process. But before we do, take a moment to appreciate the beauty and authenticity that reclaimed wood brings to your DIY farmhouse wall shelves. Its rich history and unique characteristics will add a touch of charm and warmth to your space.
Preparing the Reclaimed Wood for Your DIY Farmhouse Wall Shelves
Before you start building your DIY farmhouse wall shelves, it’s important to prepare the reclaimed wood. This step is crucial to ensure that your shelves are sturdy, safe, and have the desired rustic look. Follow these guidelines to properly prepare the reclaimed wood:
Cleaning the Wood
Begin by cleaning off any dirt, dust, or debris from the reclaimed wood. Use a soft brush or cloth to gently remove any loose particles. This will create a cleaner surface for the next steps.
Removing Nails and Hardware
Carefully inspect the wood for nails, screws, or other hardware that may be embedded in it. Use pliers or a claw hammer to remove any nails or screws that are protruding. This will prevent injuries while working with the wood and ensure a smooth surface for your shelves.
Sanding the Surface
To achieve a smooth and safe surface for your DIY farmhouse wall shelves, you’ll need to sand the reclaimed wood. Start with a coarse-grit sandpaper to remove any roughness or splinters. Then, switch to a finer-grit sandpaper to achieve a smooth finish. Sand in the direction of the wood grain for the best results.
Stripping or Sanding Paint and Finish
If the reclaimed wood has any paint, varnish, or other finish on it that doesn’t align with your desired rustic look, you may need to strip or sand it away. Use a paint stripper or sandpaper to remove the existing finish until you reach the bare wood. Take caution and follow the instructions on the paint stripper product for safety.
Once you’ve followed these steps, your reclaimed wood will be ready for the next phase of building your DIY farmhouse wall shelves. Proceed with confidence knowing that you have prepared the wood to ensure a successful and visually appealing project.
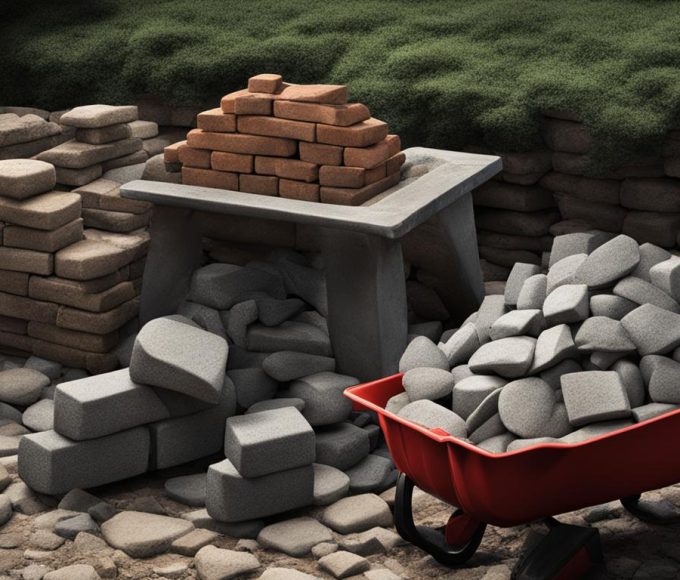
Building the Brackets for Your DIY Farmhouse Wall Shelves

The brackets play a crucial role in supporting your DIY farmhouse wall shelves, and you can build them using various materials. In this section, we will focus on using barn wood to create the brackets, adding to the rustic charm of your shelves.
To start, measure and cut the barn wood to the desired size. Typically, the brackets should be slightly shorter than the actual shelf to ensure a snug fit. Next, you will need two pieces of wood connected at a 90-degree angle to form an L shape. This will provide stability and support for your shelves. Additionally, create an angled piece that connects the two parts of the L shape, securing them together.
Building the brackets requires precision and attention to detail. Use a saw and sandpaper to shape the wood to your desired specifications. Ensure that all angles are accurate, and the pieces fit together snugly. Once you have built the brackets, you are ready to move on to the next step in the process.
Assembling Your DIY Farmhouse Wall Shelves
With the reclaimed wood prepared and the brackets built, it’s time to assemble your DIY farmhouse wall shelves. Follow these steps to ensure a secure and visually appealing final result:
1. Attach the Brackets to the Wall
Start by finding the studs in the wall where you plan to install your shelves. Use a stud finder or tap on the wall to locate the solid areas. Once you’ve found the studs, mark their locations on the wall. Place the brackets on the marked spots and use a level to ensure they are straight. Secure the brackets to the wall using appropriate screws or mounting hardware, making sure they are firmly attached. This step will provide a strong foundation for your shelves.
2. Attach the Reclaimed Wood Shelves
Once the brackets are securely in place, it’s time to attach the reclaimed wood shelves. Position each shelf on top of the brackets, ensuring that they are level and aligned properly. Use screws to securely fasten the shelves to the brackets, making sure they are tightly secured. Take your time and double-check the alignment to ensure the shelves are straight and well-balanced.
3. Ensure Levelness and Stability
After attaching the shelves, step back and assess the overall appearance. Use a level to confirm that the shelves are level horizontally. Additionally, gently press down on each shelf to check for any instability or wobbling. If you notice any issues, adjust the brackets or tighten the screws as necessary to ensure the shelves are stable and level.
Once you have completed these steps, your DIY farmhouse wall shelves are ready to be enjoyed. They provide a beautiful and functional addition to any room, allowing you to display your cherished items in a rustic and charming way.
Follow the assembly instructions carefully to ensure the shelves are secure and safe to use. Take your time and enjoy the process, knowing that you’ve created a unique piece of farmhouse-style decor with your own hands.
Finishing Touches for Your DIY Farmhouse Wall Shelves
Once your DIY farmhouse wall shelves are assembled, it’s time to add those final finishing touches that will truly bring out their rustic charm. These small details can make a big difference in completing the farmhouse-style aesthetic of your shelves. Here are a few ideas to consider:
Filling Nail or Screw Holes
To create a seamless and polished look, fill any visible nail or screw holes with putty. This will give your shelves a smoother surface and make them appear more professionally crafted. Choose a putty that matches the color of your wood to ensure a seamless finish.
Applying a Final Coat of Stain or Paint
If you want to enhance the color and protection of your reclaimed wood shelves, consider applying a final coat of stain or paint. This step can help bring out the natural tones and grains of the wood, giving it a more refined and polished appearance. Select a stain or paint color that complements your overall decor scheme.
Distressing the Wood for an Aged Look
If you prefer a more weathered and aged look for your DIY farmhouse wall shelves, you can distress the wood. Use sandpaper, a wire brush, or even a hammer and nails to create intentional wear and tear on the surface of the wood. This technique will add character and a sense of history to your shelves.
Remember, the goal is to enhance the rustic charm of your DIY farmhouse wall shelves while still maintaining their functionality. Take your time and experiment with different finishing techniques until you achieve the desired aesthetic. This is where your creativity can truly shine!
Now that you’ve added the finishing touches, step back and admire your beautiful DIY farmhouse wall shelves. The combination of reclaimed wood, craftsmanship, and attention to detail has created a unique and charming piece of decor that will be a standout feature in any room.
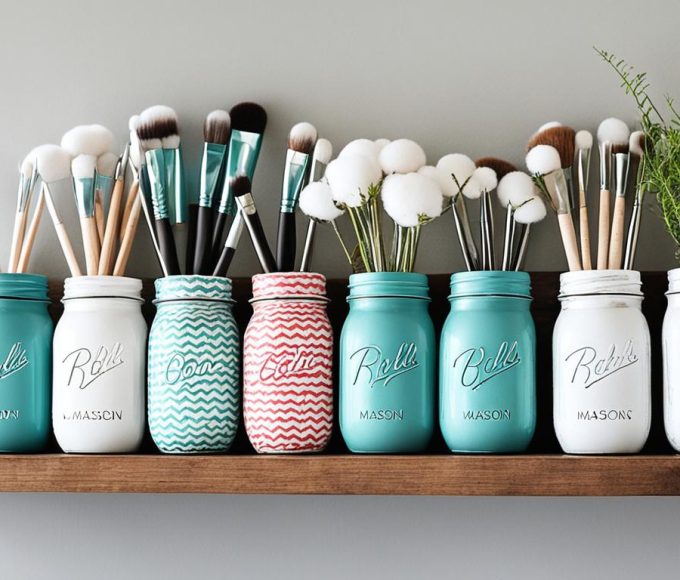
Styling and Decorating Your DIY Farmhouse Wall Shelves
Once your DIY farmhouse wall shelves are complete, it’s time to style and decorate them to suit your personal taste and the overall theme of your space. The beauty of DIY farmhouse wall shelves lies in their versatility and the ability to customize them to fit any room and reflect your personal style.
Consider adding some farmhouse-style decor to enhance the rustic charm of your shelves. Ceramic serve ware, vintage books, and potted plants are all great options to accentuate the farmhouse aesthetic. Experiment with different arrangements and items until you achieve the desired look.
Remember that styling and decorating your DIY farmhouse wall shelves is an opportunity to showcase your creativity and make the space truly your own. Don’t be afraid to mix and match different elements to create a unique arrangement that reflects your personality.
For a cohesive look, consider incorporating other farmhouse-style elements into the room, such as distressed furniture, vintage-inspired light fixtures, or textured textiles. These additional touches will help tie the room together and create a harmonious farmhouse-inspired space.
Whether you prefer a minimalist and clean aesthetic or a more eclectic and layered look, your DIY farmhouse wall shelves can be the perfect canvas for your personal style. Have fun with the process and let your creativity shine!
Additional Uses for DIY Farmhouse Wall Shelves
DIY farmhouse wall shelves offer more than just a designated spot for displaying decor items. They can serve a variety of practical purposes, making them a versatile addition to any room in your home. Here are some creative ideas for utilizing your DIY farmhouse wall shelves:
1. Living Room Showcase
Transform your living room into a cozy haven by using your DIY farmhouse wall shelves to display your favorite books, family photos, or cherished keepsakes. Create an inviting focal point by arranging shelves at different heights and incorporating decorative elements that reflect your personal style.
2. Pantry Organization
Add a touch of rustic charm to your pantry while maximizing storage with DIY farmhouse wall shelves. Use them to neatly store jars, cans, and other pantry staples, keeping everything within easy reach. Not only will this create a visually appealing space, but it will also make meal preparation more efficient.
3. Laundry Room Helper
Incorporate DIY farmhouse wall shelves into your laundry room to keep essentials like detergent, fabric softener, and dryer sheets organized and easily accessible. You can also use them to display decorative storage baskets for sorting laundry or to hold freshly folded towels.
4. Bathroom Storage Solution
Add a touch of rustic elegance to your bathroom while increasing storage space with DIY farmhouse wall shelves. Utilize them to store towels, toiletries, and decorative elements like potted plants or scented candles. These shelves not only provide functionality but also add a charming focal point to your bathroom decor.
5. Home Office Organizer
Keep your home office clutter-free and stylish with the help of DIY farmhouse wall shelves. Use them to store books, office supplies, and decorative accents that inspire creativity. By incorporating these shelves into your workspace, you’ll create an inviting environment that fosters productivity and organization.
As you can see, DIY farmhouse wall shelves have countless applications beyond traditional decor displays. Get creative and experiment with different uses to find the perfect fit for your space. Whether it’s organizing your pantry, adding a rustic touch to your living room, or maximizing storage in your bathroom, these versatile shelves are sure to enhance the functionality and aesthetic of any room.
Final Thoughts on DIY Farmhouse Wall Shelves
Building your own DIY farmhouse wall shelves is a rewarding and budget-friendly project that can add rustic charm and character to your home. By using reclaimed wood and customizing the design to fit your space, you can create one-of-a-kind shelves that tell a story and bring warmth to any room.
Whether you’re an experienced DIYer or just starting out, this guide has provided you with the inspiration and information you need to get started. With a little creativity and the right materials, you can transform reclaimed wood into beautiful farmhouse-style wall shelves that reflect your personal style.
Not only do DIY farmhouse wall shelves offer practical storage and organization, but they also provide an opportunity for self-expression. Each shelf you build becomes a unique piece of art, showcasing your craftsmanship and love for homemade decor.
So, roll up your sleeves, grab your tools, and let your imagination run wild. Get started on your DIY farmhouse wall shelves project today and see how this simple addition can transform your space into a cozy and inviting haven.
Bringing Rustic Charm to Your Home
By incorporating DIY farmhouse wall shelves into your home decor, you can infuse rustic charm and create a welcoming atmosphere. These shelves not only serve as a functional storage solution but also provide a beautiful display area for your favorite decor items, such as vintage books, potted plants, or family photographs.
Share Your DIY Farmhouse Wall Shelves
If you decide to take on the project of building your own DIY farmhouse wall shelves, we would love to see the results! Share your creations on social media with the hashtag #DIYFarmhouseWallShelves to inspire others and showcase your craftsmanship. Building DIY projects is not only about the end result, but also about the process and the sense of accomplishment that comes with creating something beautiful with your own hands.
Whether you’ve added a creative twist to the design, used unique reclaimed wood, or found innovative ways to style your shelves, sharing your DIY journey can be both motivating and influential. By joining the #DIYFarmhouseWallShelves community, you’ll become part of a like-minded group of individuals passionate about home improvement and farmhouse decor.
Share your progress photos, success stories, and even the challenges you encountered along the way. Your experiences may provide valuable insights and inspiration to others who are embarking on their own DIY projects. You never know who you might inspire or whose creativity you might ignite by sharing your DIY farmhouse wall shelves.
Conclusion
DIY farmhouse wall shelves are an excellent way to add rustic charm and farmhouse style to any room in your home. By using reclaimed wood and following the step-by-step process outlined in this article, you can create your own unique shelves that not only provide functional storage but also tell a story and add character to your space.
One of the beautiful aspects of DIY farmhouse wall shelves is embracing the imperfections in the reclaimed wood. These imperfections add to the overall charm and authenticity of your shelves, giving them a rustic and weathered look. As you embark on your project, enjoy the process of building something with your own hands and appreciate the natural beauty that comes from using reclaimed materials.
So why wait? Start your DIY farmhouse wall shelves project today and bring the warmth and charm of farmhouse decor into your home. Follow the step-by-step guide provided in this article, source your reclaimed wood, prepare it, build the brackets, assemble the shelves, add your own finishing touches, and style them in a way that reflects your personal taste and the theme of your space. The possibilities are endless, and the end result will be a one-of-a-kind piece that will be both functional and a focal point in your home.


