Welcome to our DIY guide on crafting personalized hand-stamped jewelry at home. Are you looking for a creative and heartfelt gift idea? With our step-by-step instructions and handy tips, you can create your own unique and custom hand-stamped jewelry pieces. Whether you want to make homemade personalized jewelry for yourself or surprise someone special, this guide will help you master the art of hand-stamping.
Hand-stamped jewelry allows you to add sentimental value and a personal touch to your accessories. By utilizing various hand-stamping techniques and tools, you can transform simple blanks into stunning pendants, earrings, bracelets, and more.
This guide covers the essential hand-stamping tools you’ll need, practical tips for successful stamping, and inspiring jewelry ideas to get your creative juices flowing. Whether you’re a beginner or have some experience in jewelry making, our guide is designed to help you create beautiful custom hand-stamped jewelry with confidence.
So, grab your tools and let’s dive into the wonderful world of DIY hand-stamped jewelry. Your crafting journey starts now!
Getting Started with Hand Stamping
Before you begin creating your own personalized hand-stamped jewelry at home, it’s important to gather the essential tools and materials. Having the right supplies will ensure that you can easily bring your jewelry ideas to life. Here’s what you’ll need:
1. Stamp Set: A stamp set is the key tool for hand-stamping. It typically includes a variety of letters, numbers, and symbols that you can use to create your custom designs. Choose a set that suits your style and preferences.
2. Hammer: A basic hammer is essential for transferring the stamps onto metal blanks. Look for a hammer with a sturdy and comfortable grip that allows you to apply the right amount of pressure.
3. Blanks: Blanks are the blank materials on which you will be stamping your designs. They come in different shapes and sizes, such as discs, rectangles, or tags. It’s a good idea to have a collection of blanks on hand so you can experiment with different jewelry designs.
4. Scrap Wood: Having a scrap piece of wood is useful for practicing hand-stamping techniques before moving on to your actual jewelry blanks. This way, you can ensure that you’re holding the stamp correctly and get a feel for the amount of pressure needed.
Gathering these hand-stamping tools will set you up for success in your jewelry making journey. So, go ahead and prepare your crafting space with these essentials, and get ready to unleash your creativity!
Stamping Process and Techniques
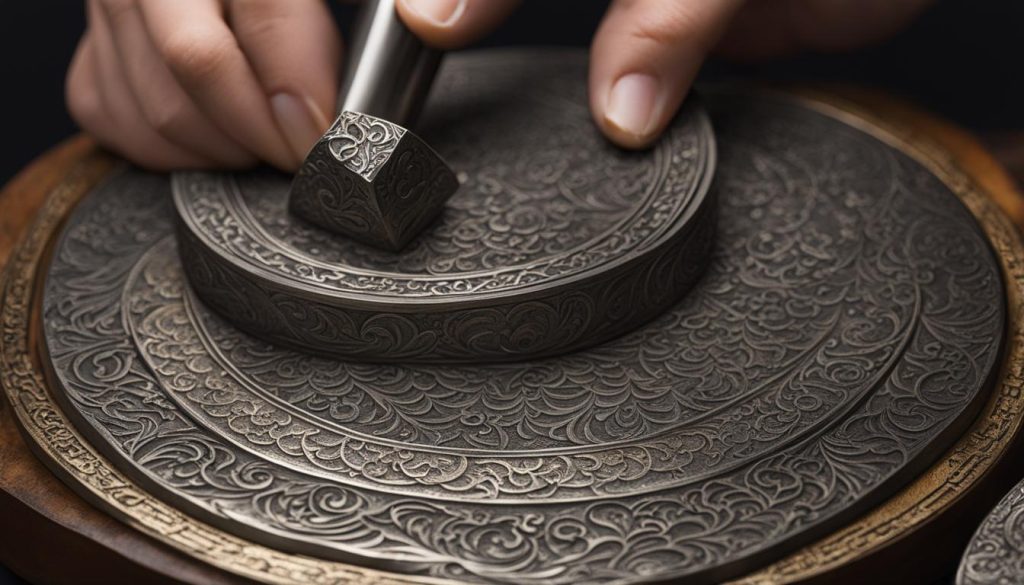
To create stunning hand-stamped jewelry, it’s essential to master the art of stamping. The stamping process involves a few key techniques that will help you achieve professional-looking results every time.
Holding the Stamp and Hammering
When stamping, it’s crucial to hold the stamp firmly and straight on the blank. This ensures a clean and precise impression. With a confident grip, hammer the stamp onto the blank with a solid force, aiming for at least 10-15 hammer strikes. This vigorous hammering transfers the image onto the metal, creating a lasting impression.
Complete Transfer
After stamping, check to ensure that every part of the stamp has transferred onto the blank. If any areas appear faint or incomplete, reposition the stamp and repeat the hammering process until the image is fully transferred. Consistency and attention to detail are key for creating high-quality hand-stamped jewelry.
Enhancing the Stamped Impressions
Once the stamping is complete, make your hand-stamped jewelry stand out even more by coloring in the stamped letters or design. Use a sharpie marker to fill in the grooves, then gently wipe away any excess ink with a cotton ball soaked in nail polish remover. This technique adds depth and dimension to the stamped impressions, making them visually striking.
Embrace the Imperfections
Remember, hand-stamping doesn’t require perfection. In fact, the charm of hand-stamped jewelry lies in its unique imperfections. Each piece carries the character and individuality of a handcrafted item. So, don’t fret over slight variations or non-uniform spacing. Instead, embrace these imperfections, knowing that they contribute to the overall beauty and personal touch of your custom hand-stamped jewelry.
Jewelry Ideas and Inspiration
The possibilities are endless when it comes to creating jewelry with hand-stamped pieces. You can make beautiful hand-stamped necklaces, bracelets, rings, earrings, and more. Let your creativity shine as you design unique and personalized pieces that reflect your style and story.
For a trendy and versatile accessory, consider making a hand-stamped wrap bracelet. Use small hand-stamped initial rounds on a leather cord to create a stylish and customizable bracelet. This is a great option for layering with other bracelets or wearing on its own.
Another meaningful jewelry idea is a hand-stamped necklace with the initials of a mother’s children’s names. This personalized piece of jewelry makes a sentimental and thoughtful gift. Choose a delicate chain and carefully hand-stamp each initial on a small disc or charm.
If you’re looking for a piece that exudes elegance and simplicity, a hand-stamped bar necklace is a perfect choice. Add meaningful words or phrases, like “grace” or “love,” to the hand-stamped bar to create a personalized and inspiring piece of jewelry.
Don’t be afraid to mix and match different hand-stamped pieces to create a unique and eclectic look. Combine a hand-stamped necklace with a stack of hand-stamped bracelets for a stylish and fashionable statement. The beauty of hand-stamped jewelry is that it can be customized to perfectly suit your individual taste.
Discover the beauty of custom hand-stamped jewelry and let your creativity shine. Design personalized pieces that hold special meaning and make a lasting impression.
Where to Find Supplies
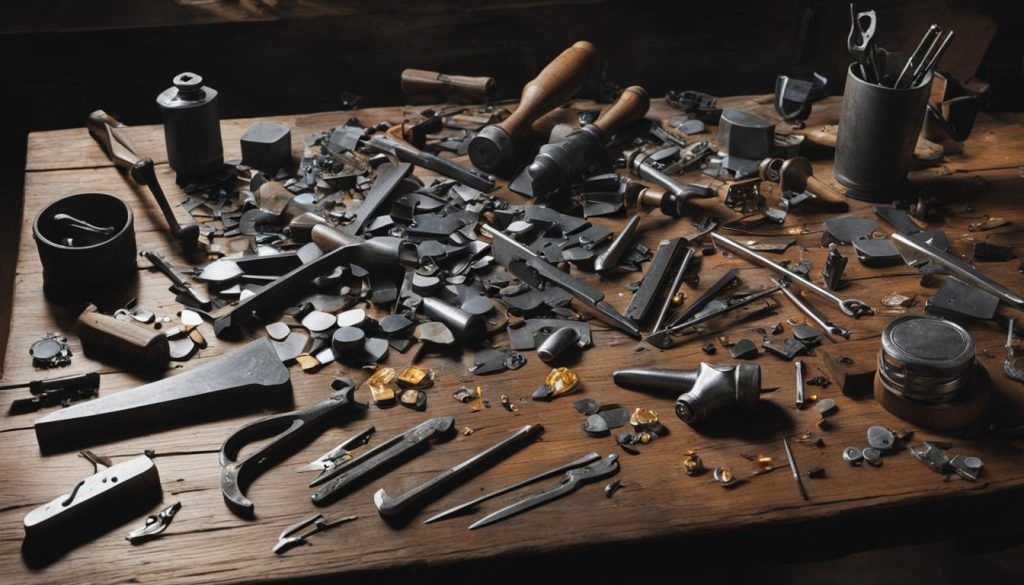
If you’re eager to start your hand-stamping journey, you’ll need to gather the right tools and materials. Don’t worry; tracking down hand-stamping supplies is easier than you might think!
You can find hand-stamping tools, blanks for jewelry making, and stamp sets at various craft stores, both in-store and online. Two popular outlets that carry a selection of these supplies are Hobby Lobby and Michaels. They offer a wide range of tools and blanks to help you unleash your creativity.
If you prefer the convenience of online shopping or are looking for a greater variety of options, websites like Goody Beads and Beaducation have got you covered. These websites specialize in providing hand-stamping enthusiasts with a diverse assortment of tools, stamp sets, and blanks specifically designed for creating personalized and custom hand-stamped jewelry.
With these trusted sources, you can easily get your hands on the hand-stamping supplies you need to bring your jewelry-making ideas to life.
Tips for Successful Stamping
When it comes to hand-stamping techniques, it’s important to keep a few tips in mind to ensure that your personalized jewelry turns out beautifully. Whether you’re a beginner or have some experience with hand-stamping, these tips can help you achieve excellent results.
Start with Initials and Progress
If you’re new to hand-stamping, it’s best to start with initials rather than attempting longer words or phrases right away. This allows you to practice the technique and build your confidence. Once you feel comfortable, you can then progress to stamping longer words or more intricate designs on your custom hand-stamped jewelry.
Practice Makes Perfect
Like any skill, hand-stamping requires practice to become proficient. Take the time to practice stamping on scrap pieces of metal or blanks before moving on to your final jewelry pieces. This allows you to refine your technique and ensure you’re happy with the results before stamping on your desired materials.
Double-Check and Hold Firmly
Paying attention to the direction of the stamp is crucial to achieving a clean and legible impression. Always double-check the stamp’s orientation before every use to ensure it’s facing the right way. Additionally, hold the stamp firmly in place while striking it with the hammer to ensure a crisp and even impression.
Use Masking Tape or Stamp-Straight Tape
Spacing and alignment can be challenging when hand-stamping words or phrases in a line. To help with this, you can use masking tape or stamp-straight tape as a guide. Simply apply the tape to your metal blank, marking the desired placement for each stamp. This helps maintain consistency and accuracy in your spacing and alignment.
Embrace Imperfections for Charm
It’s important to remember that hand-stamped jewelry doesn’t have to be perfect. In fact, the small imperfections add character and charm to each piece. Embrace these unique characteristics as they make your custom hand-stamped jewelry truly one-of-a-kind.
By following these tips and techniques, you’ll be well on your way to creating beautiful and personalized hand-stamped jewelry that reflects your own style and creativity.
Step-by-Step Tutorial: Stamping a Necklace
Creating your own custom hand-stamped necklace is a wonderful way to showcase your creativity and personal style. Follow this step-by-step tutorial to bring your personalized jewelry ideas to life!
1. Select a blank: Start by choosing a blank for your necklace. This can be a metal disc, a bar, or any other shape that appeals to you. Consider the size and material of the blank based on your preferences.
2. Mark the placement: Use a pencil or tape to mark the desired placement of the stamps on the blank. This will help you ensure the letters or designs are aligned and centered.
3. Stamp the blank: With your stamp set and hammer in hand, carefully position the stamps on the marked spots and firmly strike the hammer to imprint the design onto the blank. Take your time and apply consistent pressure to ensure a clean and clear impression. Repeat this process for each letter or design you want to include.
4. Fill the impressions: Once the stamping is complete, take a sharpie marker and fill in the stamped impressions. This will make the letters or designs more visible and add depth to your piece. Be careful not to color outside the lines and focus on capturing the intricacies of your hand-stamped jewelry.
5. Remove excess ink: After filling in the stamped impressions, use a cotton ball soaked in nail polish remover to remove any excess ink. Gently rub the surface of the blank to clean it and ensure that only the stamped grooves are filled with the marker ink. This step will give your necklace a polished and professional look.
6. Polish the piece: Take a polishing cloth and gently rub the entire surface of the blank to remove any marks or smudges. This will give your necklace a finished and shiny appearance, making it ready to wear or gift to someone special.
7. Attach the blank to a chain: To complete your hand-stamped necklace, choose a chain or cord that complements the design and attach the stamped blank to it. This can be done using jump rings or by directly stringing the chain through a hole in the blank. Make sure the necklace is securely fastened before wearing or gifting it.
Now that you’ve mastered the art of stamping a necklace, you can create personalized jewelry pieces that reflect your unique style and make heartfelt gifts for your loved ones. Have fun exploring different hand-stamping techniques and expressing your creativity through custom hand-stamped jewelry!
Video Tutorial: Metal Stamping Techniques
Are you looking to improve your hand-stamping techniques and create personalized jewelry that stands out? Look no further than video tutorials that offer step-by-step guidance and inspiration. These videos cover a range of metal stamping techniques, providing valuable insights for beginners and seasoned crafters alike.
Learn how to emboss a pendant, add texture to metal, and create unique designs using metal stamps. These tutorials offer a hands-on approach, allowing you to visually grasp the techniques and follow along at your own pace. Watching these videos will not only enhance your technical skills, but also ignite your creativity and provide personalized jewelry ideas that are sure to impress.
With just a few hand-stamping tools and a world of inspiration from these video tutorials, you can take your personalized jewelry-making to the next level. So why wait? Explore the art of metal stamping and unlock endless possibilities for creating beautiful and meaningful pieces.
Remember, practice makes perfect, and with the right guidance, you’ll be able to confidently apply these metal stamping techniques to your own handmade jewelry creations.+
Check out this video tutorial for a sneak peek into the world of metal stamping:
Troubleshooting and Common Questions
Hand-stamping is a creative and enjoyable way to craft personalized jewelry at home. However, it’s not uncommon to encounter a few challenges along the way. Here are some common issues that may arise during the hand-stamping process, along with tips to overcome them:
Straight Impressions
Getting a straight and even impression can be tricky, especially for beginners. To achieve straight impressions, it is essential to use a specialty brass stamping hammer and work on a steel bench block. The weight and material of the hammer, combined with the sturdy surface of the bench block, will help ensure a more controlled and accurate strike. Additionally, using marking tape as a guide can assist in maintaining alignment and preventing slanting.
Avoiding Double Impressions
Double impressions can occur when the stamp is struck multiple times or with uneven pressure, resulting in overlapping or blurry letters. To avoid this, remember to strike the stamp once in a firm and consistent manner. Do not attempt to re-stamp the same area. If you’re concerned about not getting a clear impression in one strike, practice on a scrap piece of metal beforehand to gain confidence in your technique.
Centering the Text
Centering the text on the blank is crucial to achieving a balanced and aesthetically pleasing design. To ensure proper positioning, mark the center of the blank using a pencil or tape as a guide before stamping. Take your time to carefully line up each letter or design with the marked center point. This simple step will help you create beautifully centered and professional-looking hand-stamped jewelry.
Remember, practice makes perfect. It’s always a good idea to start with inexpensive blanks before working with more expensive metals like silver. Take your time, be patient, and don’t be discouraged by imperfections—hand-stamped jewelry has its own unique charm and character.
Mastering hand-stamping techniques can be a rewarding journey. To troubleshoot any issues you may encounter, refer to the tips provided and keep practicing. With time and dedication, you’ll become more skilled in creating personalized and one-of-a-kind hand-stamped jewelry pieces.
Caring for Hand-Stamped Jewelry
To keep your hand-stamped jewelry looking its best, it’s important to take proper care of it. By following a few simple steps, you can ensure that your personalized pieces remain beautiful and vibrant for years to come.
Avoid exposing your hand-stamped jewelry to harsh chemicals or abrasive materials. These substances can cause damage and tarnishing to the metal, affecting the overall appearance of the piece. It’s best to remove your jewelry before engaging in activities that may subject it to contact with chemicals or abrasive surfaces.
Clean your hand-stamped jewelry gently and regularly. Using a soft polishing cloth, gently wipe the surface of your jewelry to remove any dirt or fingerprints. This will help maintain the shine and luster of the metal, keeping your personalized designs looking their best.
Store your hand-stamped jewelry in a dry and secure place. Moisture can cause metal jewelry to tarnish, so it’s important to store your pieces in a dry environment. Consider using a jewelry box or a soft pouch to protect your jewelry from dust and prevent it from becoming tangled or scratched.
By following these care instructions, your hand-stamped jewelry can last for years and continue to be a cherished personalized accessory. Remember, each piece is unique and reflects your individuality, so take the time to care for it properly. With a little attention and care, your hand-stamped jewelry will remain a beautiful and meaningful addition to your personal style.
Conclusion
Crafting personalized hand-stamped jewelry at home is not only a creative outlet but also a gratifying DIY project. By utilizing the right tools, materials, and techniques, you can design and create one-of-a-kind, meaningful pieces of jewelry. Whether you decide to keep them for yourself or gift them to your loved ones, hand-stamped jewelry adds a personal touch and holds sentimental value.
As you embark on this creative journey, remember that practice makes perfect. Embrace the imperfections that come with hand-stamping and see them as unique characteristics that give your jewelry its charm. With each piece you create, you’ll gain more confidence and refine your skills.
So, why wait? Start your hand-stamping adventure today and unlock the endless possibilities of DIY hand-stamped jewelry. Express your creativity, showcase your personal style, and bring joy to yourself and those you care about. Get ready to make personalized and meaningful jewelry that will be treasured for years to come.


