Welcome to the vibrant and exciting world of watercolor painting! If you’re a beginner, it can be overwhelming to figure out where to start. But don’t worry, this comprehensive guide is here to help. You’ll learn everything you need to know to create stunning watercolor paintings, from essential supplies to basic techniques.
Watercolor painting is a versatile and expressive medium that allows you to create beautiful artwork with just a few simple tools. Whether you’re interested in creating landscapes, still lifes, or abstract compositions, watercolor painting is a rewarding and satisfying hobby.
In this guide, we’ll cover everything you need to know to get started with watercolor painting. We’ll introduce you to basic techniques, such as washes and wet-on-wet, and provide step-by-step tutorials to help you build your skills. We’ll also guide you through selecting the best supplies for beginners, so you can jump right in and start creating beautiful artwork.
So, whether you’re a complete beginner or have some experience with other mediums, this guide is for you. Let’s dive in and discover the exciting world of watercolor painting for beginners!
Getting Started with Watercolor Painting
Congratulations on taking the first step towards creating beautiful watercolor paintings! As a beginner, it’s important to start with the basics and familiarize yourself with the fundamental techniques. In this section, we’ll cover some beginner watercolor techniques and provide an easy watercolor tutorial to get you started.
The Importance of Technique
Before you begin any watercolor painting, it’s important to understand the basic techniques. Proper technique ensures that the paint is applied correctly and consistently, resulting in a beautiful and cohesive painting. Some of the most essential beginner watercolor techniques include:
- Basic washes: This technique involves applying a single color wash over a large area
- Wet-on-wet: This technique involves applying wet paint onto wet paper, allowing the colors to blend seamlessly
- Wet-on-dry: This technique involves applying wet paint onto dry paper, resulting in a crisper and more defined line
Easy Watercolor Tutorial
Now that you understand the basic techniques, it’s time to put them into practice with an easy watercolor tutorial. For this tutorial, we’ll create a simple landscape painting using just a few colors and techniques.
Supplies:
- Watercolor paper
- Watercolor paints (blue, green, yellow)
- Paintbrushes (large flat brush, small round brush)
- Water container
- Paper towels
Steps:
- Start by sketching a simple landscape scene onto your paper using a pencil. Include a horizon line and some basic land features.
- Use your large flat brush to wet the sky area with clean water.
- Dip your brush into the blue paint and paint the sky area with a smooth, even wash. Let it dry completely.
- Once the sky is dry, use your small round brush to paint the land area with a mixture of green and yellow paint. Use the wet-on-dry technique to create more defined edges and shapes.
- Using the same small round brush, add a darker shade of green paint to create depth and texture in the land area.
- Finally, add some details such as trees or clouds using your small round brush. You can use the wet-on-wet technique to create a more diffused effect.
- Let your painting dry completely, and then enjoy your beautiful creation!
With these beginner watercolor techniques and easy watercolor tutorial, you’re well on your way to creating stunning watercolor paintings. Don’t be afraid to experiment and try new things – the more you practice, the better you’ll become!
Essential Watercolor Supplies for Beginners
Before you start your watercolor painting journey, it’s essential to have the proper supplies. Here are the must-have watercolor supplies for beginners:
Paints
The first thing you’ll need is watercolor paint. For beginners, it’s best to start with a basic set of colors. Look for a set that includes at least the primary colors: red, blue, and yellow. Once you become more experienced, you can experiment with different colors and brands.
Brushes
When choosing brushes, look for a set that includes a variety of sizes and shapes. A round brush is great for detail work, while a flat brush is perfect for washes. It’s important to choose brushes that are specifically designed for watercolor painting to achieve the best results.
Paper
Watercolor paper is specially made to absorb water and hold the paint. There are different types of watercolor paper, such as hot-pressed, cold-pressed, and rough, each with their own unique texture. For beginners, it’s best to start with cold-pressed paper, as it’s the most versatile and forgiving.
Palette
A palette is used to hold and mix your paint. Choose a palette with wells for each color and a mixing area. There are many different types of palettes available, including plastic and porcelain. It’s best to choose one that suits your needs and preferences.
Water Containers
You’ll need two water containers: one for rinsing your brushes and one for clean water to mix with your paint. It’s important to keep your water clean and change it frequently to achieve the best results.
With these essential watercolor supplies, you’ll be ready to start your painting journey!
Mixing Colors and Palette Setup
As a beginner watercolor artist, mastering color mixing is one of the most essential skills to develop. Understanding color theory and learning how to arrange your palette effectively can bring your paintings to life and make them stand out. In this section, we will explore some tips and techniques to help you become a master of color mixing.
Color Theory
Before you begin mixing colors, it’s important to have an understanding of color theory. The primary colors are red, blue, and yellow, and they cannot be created by mixing other colors. Secondary colors are created by mixing two primary colors, while tertiary colors are created by mixing a primary and a secondary color.
A color wheel is a helpful tool that can guide you in selecting and mixing colors. It can help you choose complementary colors, which are colors that sit opposite each other on the color wheel and provide a striking contrast when used together.
Setting Up Your Palette
When setting up your palette, start by arranging your primary colors in a triangle formation. This allows you to easily mix secondary colors by blending two primary colors that are adjacent to each other. You can mix tertiary colors by combining a primary color with the secondary color that sits next to it on the color wheel.
In addition to your primary colors, you may also want to include some earth tones such as burnt sienna, raw umber, or sepia, which can add depth and warmth to your paintings. It’s important to arrange your colors in a logical order, such as starting with your lightest colors and gradually moving toward your darker colors.
Color Mixing Techniques
There are several techniques you can use to mix colors effectively. One technique is to mix colors in separate wells on your palette, using a brush to transfer the desired amount of each color to a new well, and then blending the colors together using a clean brush or by tilting the palette. Another technique is to mix the colors directly on your paper, using a wet-on-wet or wet-on-dry technique.
Remember to start with a small amount of paint and gradually add more as needed. Test your color mixtures on a scrap piece of paper before applying them to your painting to ensure they are the desired color and consistency.
Conclusion
Color mixing is a fundamental skill in watercolor painting, and with practice, you can become proficient in creating the perfect color palettes for your artwork. Remember to consider color theory when selecting your colors, arrange them in a logical order on your palette, and experiment with different techniques to find the ones that work best for you. By mastering color mixing, you can take your watercolor paintings to the next level.
Understanding Watercolor Paper
Choosing the right paper is crucial to the success of your watercolor painting. The texture, weight, and sizing of the paper can greatly affect how the paint interacts with the surface, so it’s important to understand the different options available to you.
The two main types of watercolor paper are hot press and cold press. Hot press has a smooth surface, while cold press has a textured surface. Cold press paper is the most popular choice among watercolor artists because it allows for a range of techniques and effects.
Weight
Watercolor paper comes in various weights, usually measured in pounds (lbs). The weight refers to the thickness and sturdiness of the paper. It’s important to choose a weight that can handle the amount of water and paint you plan to use. For beginners, a weight of 140 lbs is a good place to start.
Texture
The texture of the paper refers to the surface finish, which can vary from rough to smooth. Generally, rough paper is better suited for landscapes and abstract paintings, while smooth paper is better for detailed work and portraits.
Sizing
Sizing refers to the treatment applied to the paper to make it more resistant to water. There are two types of sizing: internal and external. Internal sizing is added during the paper-making process, while external sizing is added after the paper is made.
Most watercolor paper has both internal and external sizing, which allows the paint to sit on the surface of the paper for a short period of time before being absorbed. This gives you more time to work with the paint and create different effects.
When selecting watercolor paper, choose one that is specifically designed for watercolor painting. Using the wrong type of paper can result in poor paint adhesion or even cause the paper to disintegrate.
Creating Washes
Creating washes is another way to add depth to your watercolor paintings. A wash is a large area of color that covers a portion of your painting. To create a wash, wet the paper with a brush or spray bottle, then apply a thin, even layer of paint. Let it dry completely before adding additional layers.
Using Different Brush Strokes
The type of brush stroke you use can also create texture and depth in your painting. Experiment with different brush strokes, such as dry brushing or stippling, to create interesting textures and patterns.
Combining Techniques
Don’t be afraid to combine different techniques to achieve the desired effect. For example, you can create a wash and then layer on top of it with different brush strokes to create a textured effect.
With these watercolor painting techniques for beginners, you can add depth and texture to your paintings and take your artwork to the next level. Remember to practice and experiment to find the techniques that work best for you.
Introduction to Composition and Design
Creating a visually appealing watercolor painting requires more than just mastering techniques and materials. It also involves understanding the principles of composition and design. By carefully considering the placement of elements within your artwork, you can create a harmonious and balanced composition that captures the viewer’s attention.
The Rule of Thirds
One of the most fundamental concepts of composition is the rule of thirds. This involves visually dividing your painting into thirds, both vertically and horizontally. By positioning your focal point or main subject along one of these lines or at their intersection points, you can create a more dynamic and interesting composition.
Balance and Symmetry
Another important consideration in composition is balance. You want to balance out the elements within your painting to create a sense of harmony and equilibrium. This can be achieved through symmetrical compositions, where elements are mirrored on either side of the canvas. Alternatively, asymmetrical compositions involve balancing out the elements based on their visual weight or importance.
Negative Space
Don’t forget to consider the role of negative space in your composition. Negative space refers to the areas of your painting that are not occupied by any elements. By strategically using negative space, you can create a sense of depth and balance within your painting.
When it comes to design, there are a few key elements to consider. These include color, shape, and line. By carefully selecting these elements, you can create a cohesive and visually stunning composition that showcases your skills as a watercolor artist.
Keep in mind that these principles are just a starting point. Experiment with different compositions and designs to find what works best for you. Remember, practice makes perfect!
Tips for Overcoming Common Watercolor Challenges
Watercolor painting can be a challenging but rewarding artistic pursuit. As a beginner, you may face several challenges along the way. Here are some tips to help you overcome common watercolor challenges:
1. Dealing with Watercolor Blooms
Watercolor blooms occur when pigment spreads unevenly on the wet paper, creating a blotchy effect. To prevent this from happening, make sure your brush is not overly wet and work quickly to apply the paint in the desired area. You can also gently lift excess pigment with a clean, damp brush.
2. Controlling the Amount of Water on Your Brush
Controlling the amount of water on your brush is essential for achieving the desired effect in your painting. One way to control the amount of water is to have two separate jars of water: one for rinsing your brush and the other for wetting it before applying the paint. Practice using different brush pressures and water-to-paint ratios to achieve the desired effect.
3. Handling Color Mixing
Color mixing can be challenging for beginners, but understanding color theory can help. Start with primary colors and experiment with mixing them to create secondary and tertiary colors. Use a color chart to keep track of your mixes and learn which colors complement each other.
4. Achieving Layers and Depth
One way to achieve layers and depth in your watercolor paintings is to use different techniques for layering and blending. You can also experiment with different types of paper and brushes to achieve the desired effect. Remember to let each layer dry completely before adding another layer.
5. Overcoming Fear of Making Mistakes
As a beginner, it’s natural to fear making mistakes. But remember, mistakes are a natural part of the learning process. Embrace them and allow yourself to experiment and try new things. You may even discover new techniques or effects that you wouldn’t have otherwise.
By following these tips, you can overcome common watercolor challenges and become a more confident and skilled artist. Keep practicing and experimenting, and you’ll soon find your own unique style and voice in the vibrant world of watercolor painting.
Beginner-Friendly Watercolor Projects
Now that you have familiarized yourself with essential watercolor painting techniques and supplies, it’s time to put your skills to use with some beginner-friendly projects. These projects are designed to help you incorporate the techniques you’ve learned into beautiful compositions.
Simple Landscape
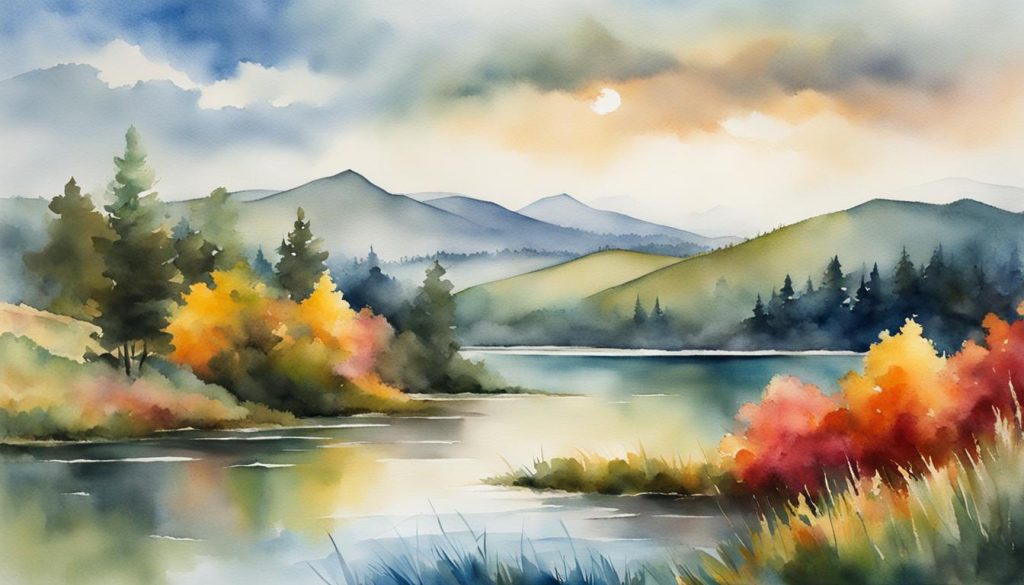
For this project, start by creating a simple background wash using blue and green watercolor paints. Once dry, use a darker shade of blue to paint mountains in the distance. Add trees and foliage using a small brush and varying shades of green. For a finishing touch, add a sun or moon in the sky using a yellow or orange hue.
Floral Bouquet
Start by sketching a simple floral bouquet on watercolor paper. Use a wet-on-wet technique to create the background by first wetting the paper with clean water, then dropping in various shades of pink and purple paint. Once dry, use a wet-on-dry technique to paint the floral bouquet, using shades of pink, red, and yellow for the flowers and varying shades of green for the foliage. Don’t forget to add in shadows and highlights for depth.
Still Life Composition
Choose a simple still life object, such as an apple or vase of flowers. Use a wet-on-wet technique to create a subtle background wash, then use a wet-on-dry technique to paint the still life object. Use varying shades of the same color for shading and highlights, and add in details with a fine-tipped brush.
Remember to have fun and experiment with different techniques and color combinations. These projects are meant to help you build confidence and refine your skills as a beginner watercolor artist.
Mastering Watercolor for Beginners: Practice Makes Perfect
Congratulations on making it this far in your watercolor painting journey! By now, you’ve learned about essential supplies, basic techniques, and how to create stunning watercolor paintings. But there’s still much to be explored and discovered.
Remember, mastering watercolor for beginners is all about practice. The more you paint, the more comfortable you’ll become with your supplies and techniques.
Experiment with Different Techniques and Styles
Continue to experiment with different watercolor techniques and styles. Take inspiration from other artists or try your hand at creating your own unique style. Don’t be afraid to push the boundaries and try new things.
Consider setting aside time each week to practice your skills. Use this time to try new techniques, work on specific areas you want to improve, or simply enjoy the act of painting without worrying about the end result.
Keep a Sketchbook or Journal
One of the best ways to improve your watercolor painting skills is to keep a sketchbook or journal. Use it to practice quick studies, jot down ideas, and experiment with different color combinations. This will also help you keep track of your progress and see how far you’ve come.
Don’t worry about making every sketch or painting perfect. The goal is to practice and experiment, not to create gallery-worthy masterpieces every time.
Join a Community or Take a Class
Joining a community of fellow watercolor artists can be a great way to learn, grow, and stay motivated. Look for local workshops, classes, or online groups to connect with other artists and share your work.
You can also consider taking a formal class or workshop to continue improving your skills and techniques. Look for classes in your area or online, and be sure to choose a class that matches your skill level and interests.
Set Goals and Track Your Progress
Setting goals and tracking your progress can be a powerful motivator. Consider setting specific goals for your painting skills or projects, and track your progress in a journal or planner.
Celebrate small victories along the way, such as finishing a painting or mastering a new technique. Remember, every small step forward is still progress.
Final Thoughts
Mastering watercolor for beginners is all about practice, experimentation, and a willingness to learn and grow. Keep pushing yourself to try new things, seek out inspiration and guidance from other artists, and most importantly, enjoy the process of painting.
With dedication and hard work, you’ll soon become a master of watercolor painting.
So grab your supplies, sit down at your easel, and let your creativity flow. You’ve got this!
Keyword: mastering watercolor for beginners


