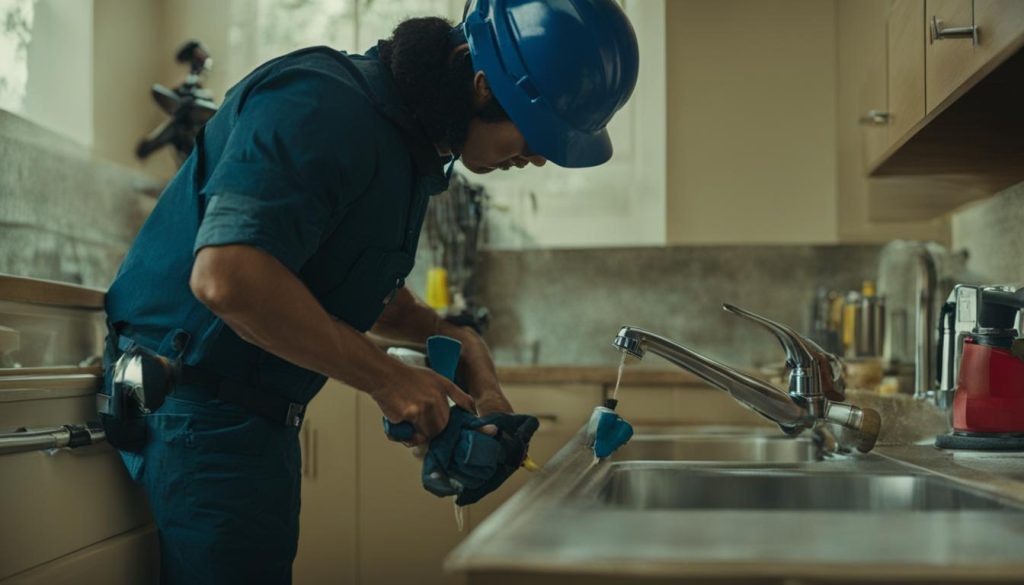
Are you tired of constantly shelling out money for home repairs? Well, we’ve got good news for you! With a little effort and some basic tools, you can tackle many home repair projects on your own, saving thousands in maintenance costs. Say goodbye to costly repair bills and hello to the satisfaction of DIY home repairs.
Once you’ve accessed the faulty part, carefully examine it to determine the cause of the leak. Oftentimes, a simple replacement of the washer or O-ring will fix the issue. If the problem is more complex, you may need to replace the entire faucet.
When replacing parts, be sure to lubricate them with plumber’s grease before reassembling the faucet. This will help prevent future leaks and ensure proper functionality.
Overall, repairing a leaky faucet is an easy DIY repair project that can save you money on your utility bill and prevent further damage to your plumbing system. By following some simple steps and having the right tools on hand, you can tackle this project with confidence.
Repairing Holes in Walls: Simple DIY Repair Projects You Can Do Yourself
If you have small or medium-sized holes in your walls, don’t panic. With a few simple steps, you can easily patch them up and restore your walls to their former glory. Before you get started, make sure you have the necessary tools and materials, including spackling paste, a putty knife, sandpaper, and paint that matches your wall color.
Step 1: Clean the Hole
Use a clean cloth or sponge to remove any debris or dust from the hole. This will ensure that the spackling paste adheres to the surface properly.
Step 2: Apply Spackling Paste
Using a putty knife, apply spackling paste to the hole. Spread it evenly and make sure it covers the entire surface. You want to fill the hole completely with spackling paste.
Step 3: Smooth Out the Surface
Use the putty knife to smooth out the surface of the spackling paste. Make sure it’s level with the surrounding wall surface. Allow the spackling paste to dry completely before moving on to the next step.
Step 4: Sand the Surface
Once the spackling paste is completely dry, use sandpaper to smooth out the surface. Sand until the surface is completely level and smooth to the touch.
Step 5: Paint the Wall
Finally, paint over the repaired area with paint that matches your wall color. Allow the paint to dry completely before adding a second coat, if necessary.
That’s it! With these simple steps, you can easily repair holes in your walls and restore the appearance of your home. Remember, practice makes perfect, so don’t be afraid to try your hand at other DIY repair projects around the house.
Replacing a Broken Light Switch
If you’re having trouble turning your lights on or off, you might need to replace a broken light switch. Fortunately, this is a repair that you can easily handle on your own with a few tools and some basic instructions.
To get started, you’ll need a flathead screwdriver, a Phillips head screwdriver, wire strippers, a voltage tester, and a replacement switch. Before you begin, make sure you turn off the power to the switch by switching off the circuit breaker. Use the voltage tester to ensure that the power is off before you proceed.
Once you’ve turned off the power, use the flathead screwdriver to remove the cover plate from the switch. Then, use the Phillips head screwdriver to remove the screws that hold the switch in place. Carefully pull the switch out of the box, but do not touch the wires.
Next, use the wire strippers to strip about ¾ inches of insulation off the ends of the wires that are connected to the old switch. Then, connect those wires to the new switch by wrapping them around the screws on the new switch and tightening the screws with your Phillips head screwdriver. Make sure the connections are tight and secure.
After you’ve connected the wires, push the new switch back into the box and secure it with screws. Finally, replace the cover plate and turn the power back on at the circuit breaker. Test the new switch to make sure it is functioning properly.
That’s it! By following these simple steps, you can easily replace a broken light switch and restore proper functionality to your home’s lighting fixtures.
Fixing a Running Toilet
If you hear a constant running sound coming from your toilet, it’s time to take action. Not only is a running toilet irritating, but it also wastes water, driving up your utility bill. You don’t need to call a plumber, though. With our simple instructions, you can fix your running toilet in no time.
Identify the Problem
The first step is to identify the problem. A running toilet is generally caused by a faulty flapper valve, which leads to the constant flow of water from the tank to the bowl. The flapper valve can become dislodged or damaged, causing leaks. It could also be that the toilet chain is too tight or too loose, leading to malfunctions.
Turn off the Water
The next step is to turn off the water supply to the toilet. The valve is usually located near the toilet base or on the wall. Turn it clockwise until it stops to shut off the water supply.
Check the Flapper Valve
With the water supply off, remove the toilet tank lid and check the flapper valve. Make sure it is correctly positioned and not damaged. If it is damaged, you need to replace it.
Adjust the Chain
If the flapper valve is fine, check the toilet chain. The chain should have some slack, but not too much. Adjust the chain length as required, so the flapper valve seals firmly and doesn’t leak.
Turn on the Water
Once you’ve made the necessary repairs, turn the water supply back on and let the tank refill. Test the toilet by flushing and listen for the sound of running water. If the problem persists, you may need to repeat the steps or call a professional plumber who can help you identify the underlying problem.
Fixing a running toilet is a simple DIY repair job that you can do with a few basic tools. By taking care of little problems like this on your own, you can save money and keep your home running smoothly.
Repairing a Squeaky Door
If you’re tired of hearing that annoying squeak every time you open or close a door, it’s time to fix it. Don’t worry; fixing a squeaky door is one of the easy DIY repair projects that you can tackle yourself without hiring a professional.
The first step is to identify the source of the squeak. Most of the time, it’s due to a lack of lubrication in the hinges. To fix this, apply some lubricant oil or petroleum jelly to the hinge pivot points. Move the door back and forth a few times to allow the lubricant to seep in and eliminate the squeak.
Additional Tips:
- If lubrication doesn’t solve the problem, it may be due to loose hinge screws. Tighten the screws to see if it addresses the squeak.
- If the hinge is damaged, it may need to be replaced. Contact a professional for help.
That’s it! With just a few simple steps, you can get rid of that annoying squeaky door and add some quietness to your home. Complete this home repair tutorial and save money by not hiring a professional.
Improving Airflow with HVAC Filter Replacement
If you’re looking for a quick and easy DIY project to improve your home’s air quality and energy efficiency, consider replacing the HVAC filters. Over time, these filters can become clogged with dust and debris, reducing the airflow and causing the system to work harder than necessary. By replacing the filters regularly, you can improve the system’s efficiency and reduce your energy bills.
DIY Repair Projects
Replacing the HVAC filters is a simple DIY repair project that requires minimal time and effort. Start by turning off the HVAC system and locating the filter. The filter may be located in the air handler unit, in the return air duct, or in a dedicated filter grille.
Once you’ve located the filter, remove it from its housing and examine it. If it’s dirty and clogged, replace it with a new one. Make sure to purchase a filter that is the correct size and type for your system. You may need to consult the manufacturer’s specifications or seek advice from a professional if you’re unsure.
Home Repair Tutorials
Replacing the HVAC filter is a simple repair tutorial that you can find easily online. There are many video tutorials available that provide step-by-step instructions for this project. You can also consult the manufacturer’s instructions or seek advice from a professional if you’re unsure.
Remember, it’s important to replace the filter regularly. How often you need to replace the filter depends on a variety of factors, including the type of filter you have, the number of people in your home, and the presence of pets or allergies. A good rule of thumb is to replace the filter every 1-3 months.
DIY Home Maintenance
Regularly replacing the HVAC filters is an important part of DIY home maintenance. By doing this simple task on your own, you can improve the air quality in your home, reduce your energy bills, and extend the life of your HVAC system. It’s a small project that can make a big difference!
Prioritizing Safety and Knowing When to Call a Professional
When it comes to DIY home repairs and improvements, keeping safety in mind should always be your top priority. Not only will it protect you from potential accidents and injuries, but it will also ensure that your repairs are done correctly and effectively. Here are some key DIY repair tips to keep in mind:
1. Wear Protective Gear
Before beginning any repair project, make sure you have the appropriate personal protective equipment (PPE). This may include gloves, safety goggles, a respirator mask, and hard hats. Protecting yourself from harmful chemicals, dust, and debris is crucial to avoid respiratory problems and other health issues.
2. Use Tools Properly
Using your tools correctly is essential for both your safety and the effectiveness of your repairs. Be sure to read the product manuals and instructions carefully before using any tool or equipment. Always unplug any electronic tool when not in use or changing blades.
3. Know When to Seek Professional Help
While many DIY repairs can be done successfully, sometimes it’s best to call in a professional. If you feel unsure about the extent of a repair, or if it involves electrical or plumbing work, it’s wise to seek expert help. Additionally, if you start a repair but realize it’s beyond your skill level, don’t hesitate to call in the pros before the problem worsens.
By following these DIY repair tips and prioritizing safety, you can avoid accidents, injuries, and costly mistakes. Remember, while DIY repairs can save you money, it’s important to know your limits and when it’s time to call in the professionals.

Knowing When to Call a Professional
While DIY home repairs can save you money, there are times when it’s best to call in a professional. If a repair project involves dangerous electrical or plumbing work, it’s best to leave it to trained experts. Attempting to fix these types of issues without proper training can be hazardous and result in costly damage.
Additionally, if you don’t have the necessary tools or experience to complete a repair project, it’s a good idea to seek professional help. Hiring a professional can ensure the job is done correctly and will save you from any mistakes that could end up costing you more in the long run.
Some signs that a project requires professional expertise include:
- Flickering lights or sparks
- Clogged pipes or sewage backups
- Roof damage or leaks
- Major structural issues
Remember, it’s okay to admit when a task is beyond your DIY skills and to reach out for help. By being aware of your limits, you can avoid dangerous situations and costly mistakes. When in doubt, always err on the side of caution and call in a professional.
Conclusion
Congratulations on completing this DIY home repairs tutorial! By taking on these projects yourself, you have saved a significant amount of money on maintenance costs and improved your home’s functionality and appearance. Remember, with the right tools and step-by-step instructions, you can successfully take on various DIY home repair projects.
Always prioritize safety and know your limits. If a repair project requires professional expertise or is beyond your skill level, don’t hesitate to call in a professional. It’s better to be safe than sorry.
Continue to explore new DIY home repairs and maintenance projects to enhance the value and comfort of your home. Utilize the SEO relevant keywords such as Home Repairs DIY, DIY Home Repairs, and DIY Home Improvement to discover more resources to help you tackle your next project. Happy repairing!


