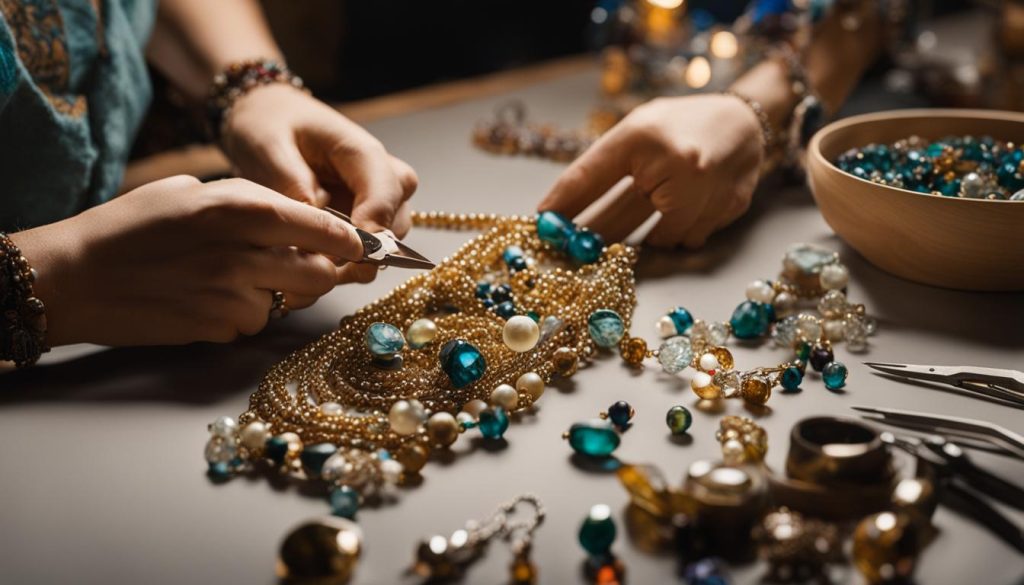
Are you interested in creating your own beautiful jewelry pieces but don’t know where to start? Look no further than this comprehensive guide to jewelry making for beginners. With step-by-step tutorials, beginner-friendly techniques, and essential supplies, you’ll have everything you need to get started on your creative journey.
Wire Wrapping
Wire wrapping is a versatile technique that involves wrapping wires around beads, stones, or other objects to create a jewelry piece. This technique requires a bit of practice and skill, but the results are stunning. You’ll need pliers, wire cutters, and various gauges of wire to create a wire-wrapped piece.
Bead Weaving
Bead weaving involves using a needle and thread to weave beads together to create a piece of jewelry. This technique can be challenging for beginners to master, but it allows for intricate designs and patterns. You’ll need beading thread, a needle, and various types of beads to create a beaded piece.
Metal Stamping
Metal stamping involves imprinting letters, shapes, or designs onto metal blanks using metal stamps and a hammer. This technique requires a bit more equipment than the others, but it allows for endless customization possibilities. You’ll need metal blanks, metal stamps, a hammer, and a stamping block to create a stamped piece.
When starting with jewelry making, experiment with different techniques to find what works best for you. Don’t be afraid to make mistakes – they are a natural part of the learning process.
Step-by-Step Guide to Creating Your First Jewelry Piece
Congratulations on taking the first step towards becoming a jewelry maker! Now that you’ve gathered all the essential tools and supplies, it’s time to create your very first piece of jewelry. In this section, we’ll provide you with a step-by-step guide that will take you through the process of making a simple but stylish bracelet. Follow along and let your creativity shine!
Step 1: Choose Your Materials
The first step in making any piece of jewelry is choosing your materials. For this bracelet, you’ll need:
- Elastic cord: Choose a cord that is strong enough to hold your beads but flexible enough to stretch over your wrist.
- Beads: Select beads in your favorite colors and shapes. You can use any type of beads you like for this project.
- Scissors: You’ll need scissors to cut your cord to the right length.
Now that you have all your materials, it’s time to get started!
Step 2: Measure Your Wrist
Wrap the elastic cord around your wrist and add an extra inch to the measurement. This will allow for a comfortable fit. Cut the cord to the appropriate length with your scissors.
Step 3: String Your Beads
Take your beads and string them onto the elastic cord in any pattern you like. You can create a simple design with just one type of bead or mix and match different colors and shapes for a more complex look. Keep stringing beads until your bracelet reaches your desired length.
Step 4: Knot the Cord
Once you’ve strung all your beads, tie the two ends of the elastic cord together in a tight knot. Make sure the knot is secure, but not too tight, to allow for some flexibility in the bracelet.
Step 5: Trim the Excess Cord
Using your scissors, trim any excess cord from the knot. Be careful not to cut the knot itself!
And voila! You’ve just created your first piece of jewelry. This simple bracelet is perfect for beginners, but as you gain more experience, you can experiment with different techniques and materials to create more complex designs. Don’t forget to show off your creations and share your newfound talent with others!
Design Inspiration and Finding Your Style
Congratulations! You’ve learned the essential techniques and tools needed for beginner jewelry making. Now it’s time to find your unique style.
Design inspiration can come from anywhere. Look at fashion trends, nature, and your personal interests for ideas. You can also experiment with different color combinations and textures to create a one-of-a-kind design. Remember, the possibilities are endless, and your jewelry designs should reflect your personality and style.
Exploring Your Options
The first step in finding your style is to explore different jewelry designs and techniques. You can browse through magazines, online stores, or visit local jewelry shops to see what’s popular. Take note of the materials and techniques used to create the pieces that catch your eye.
Once you’ve gathered inspiration, try incorporating those elements into your own designs. Don’t be afraid to experiment with different techniques and materials to create something unique.
Developing Your Signature Style
Developing your own signature style can take time, but it’s essential in setting yourself apart from other jewelry makers. Experiment with different design elements until you find what works for you. Your signature style should be a reflection of your personality and taste.
Consider incorporating a personal touch into your designs such as your favorite colors, birthstones, or charms that hold a special meaning to you. This will not only make your pieces unique but also add sentimental value for those who wear them.
Staying Inspired
As you continue to grow and evolve as a jewelry maker, it’s important to stay inspired. Attend local craft fairs, take classes, and connect with other jewelry makers to stay up to date with the latest trends and techniques. Joining online jewelry making communities can also provide a great source of inspiration and support.
Remember, finding your style is a journey, not a destination. Have fun with it and allow your creativity to flow as you create your own unique pieces.
Troubleshooting Common Jewelry Making Issues
As a beginner, you might encounter some hitches while making your jewelry. However, it is important to not give up and learn how to overcome these issues. Here are some common jewelry making problems you may face and how to resolve them:
Fixing Broken Chains
It’s common to accidentally break a chain while making jewelry. However, you can easily fix it by using pliers to open the broken link, then attach it to the end of the broken chain. Finally, close the link securely with the pliers.

Untangling Knots
Knots are an inevitable part of jewelry making, especially when working with small beads and threads. However, you can untangle them by using a needle or a pair of tweezers. Simply insert the needle or tweezers into the knot and gently loosen it until it becomes untangled.
Choosing the Right Beads and Findings
It’s important to choose the right beads and findings for your project to avoid issues later on. Make sure to match the sizes and colors of your beads, and choose the right type of finding for your design. For example, if you’re making a necklace, choose a clasp that will secure it properly.
Soldering Mishaps
Soldering can be tricky for beginners, and it’s common to make mistakes. If you accidentally solder two pieces of metal together, you can use a jeweler’s saw to separate them. Alternatively, you can use sandpaper to remove the excess solder.
These are just a few examples of the common issues you may face when making jewelry. Remember, practice makes perfect, and with time, you’ll become more confident in your jewelry making skills.
Taking Your Jewelry Making Skills to the Next Level
Congratulations, you’ve mastered the basics of jewelry making! Now, it’s time to explore more advanced techniques to take your skills to the next level. Fortunately, there are plenty of beginner-friendly jewelry making tutorials available online and in-person workshops that can help you achieve your goals.
Online Tutorials
Online tutorials are a great way to learn new techniques and get inspiration from other jewelry makers. There are numerous websites and YouTube channels dedicated to jewelry making tutorials for beginners. Some of the most popular websites include:
- Jewelry Making Journal – This website offers a variety of tutorials on different jewelry making techniques, as well as tips on running a jewelry making business.
- Beaducation – This website specializes in metalworking techniques, such as soldering and metal stamping.
- Jewelry Tutorial Headquarters – This website offers a wide range of tutorials on different jewelry making techniques, including wire wrapping and bead weaving.
By following along with these tutorials, you can learn new techniques, experiment with different materials, and hone your jewelry making skills.
In-Person Workshops
In-person workshops offer a hands-on learning experience that can help you take your skills to the next level. Many local craft stores offer workshops on different jewelry making techniques, such as wire wrapping and bead weaving. You can also attend jewelry making retreats or conferences to learn from experienced professionals and meet other jewelry makers.
Attending workshops is a great way to get feedback on your work, learn from others, and connect with like-minded individuals who share your passion for jewelry making.
Remember, the key to taking your jewelry making skills to the next level is practice and experimentation. Don’t be afraid to try new techniques and materials, and don’t get discouraged if your first attempts don’t turn out the way you envisioned. With patience and persistence, you can continue to develop your skills and create increasingly complex and beautiful jewelry pieces.
Turning Your Hobby into a Business
Have you been creating beautiful jewelry pieces as a hobby and want to turn it into a business? It’s possible to make money doing what you love by selling your handmade jewelry. With the rise of online marketplaces, social media, and e-commerce platforms, it’s easier than ever to showcase your creations and reach a wider audience.
Before you start selling, it’s important to establish your brand and determine your target market. Think about what makes your jewelry unique and who would be interested in buying it. Consider factors such as your style, materials, and pricing.
One of the first steps in selling your jewelry is setting up an online shop. Platforms like Etsy, Shopify, and Big Cartel offer an easy way to create an online storefront and connect with potential customers. Make sure to include high-quality photos and detailed descriptions of your products.
As your business grows, it’s important to stay organized and keep track of your finances. Use a spreadsheet or accounting software to keep track of expenses, sales, and profits. Consider investing in a separate bank account and business insurance.
Networking and promotion are also essential to growing your business. Attend craft fairs, markets, and events to showcase your jewelry and meet other makers. Utilize social media to share your products and connect with potential customers. Collaborate with other businesses or influencers to expand your reach.
With dedication and hard work, you can turn your jewelry making hobby into a successful business. Don’t be afraid to take risks and try new things. Remember to stay true to your style and vision, and most importantly, have fun!
Conclusion: Embrace Your Creativity in Jewelry Making
Congratulations on completing this comprehensive beginner’s guide to jewelry making! We hope that you’ve gained the necessary knowledge and techniques to get started on creating your own unique pieces. Remember, practice makes perfect, so don’t be discouraged if your first attempts don’t turn out the way you wanted them to.
With easy jewelry making techniques, you can learn to create stunning pieces in no time. The key is to have patience, be persistent, and most importantly, have fun while doing it.
Whether you’re looking to create jewelry for personal use or potential business ventures, this guide has provided you with the essential tools, supplies, and techniques to get started. Now, it’s up to you to let your creativity soar and explore your unique style.
With jewelry making, there are no limits to what you can achieve. So, embrace your creativity, and let your imagination run wild as you unleash your inner designer.


